Stinger bodysuit vintage ruffle hack
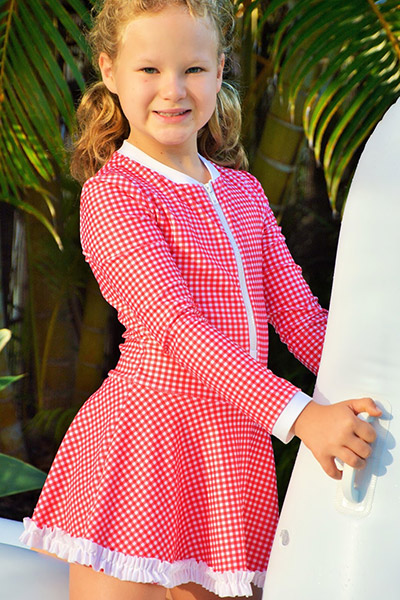
Today I am very excited to show you my latest sewing project. Stinger bodysuit vintage ruffle hack. From the time that I created this pattern, my daughter’s friends have quite vocally let me know they wanted one as well. Slowly the whole group of them are getting one to wear, this is the 10th Stinger Suit that I have had the pleasure to sew.
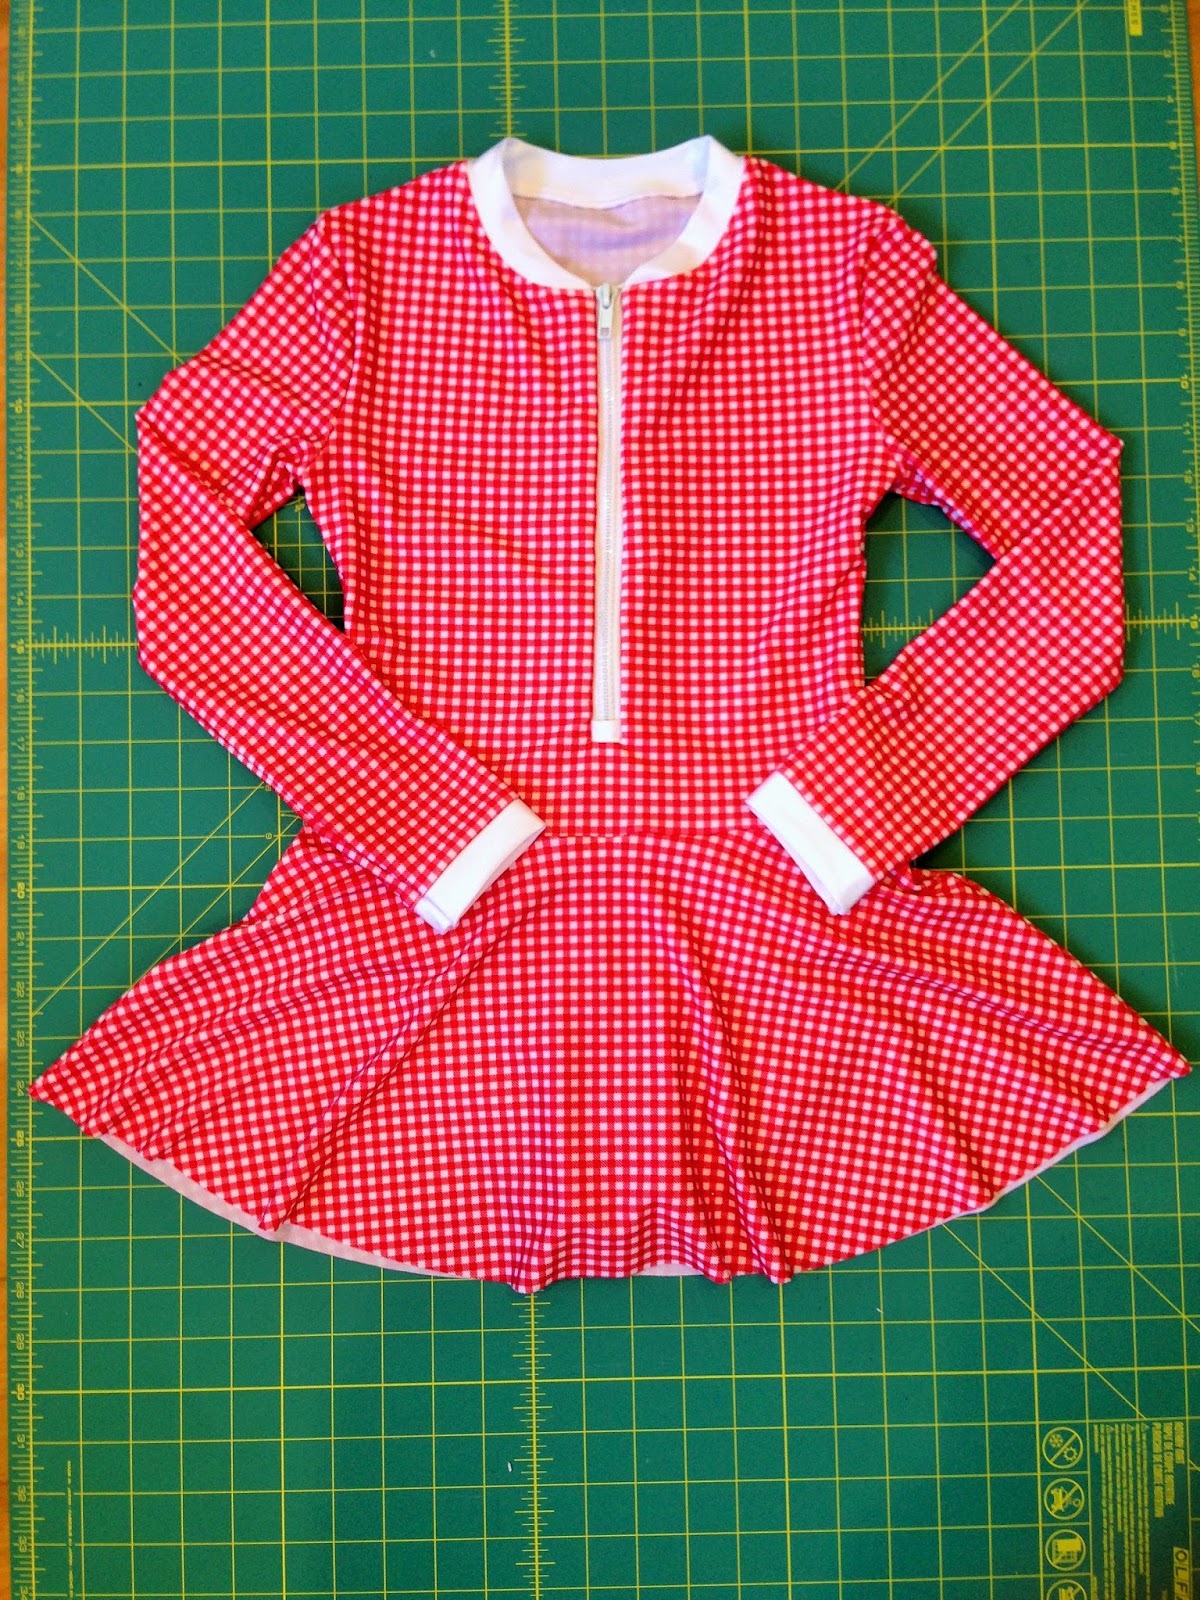
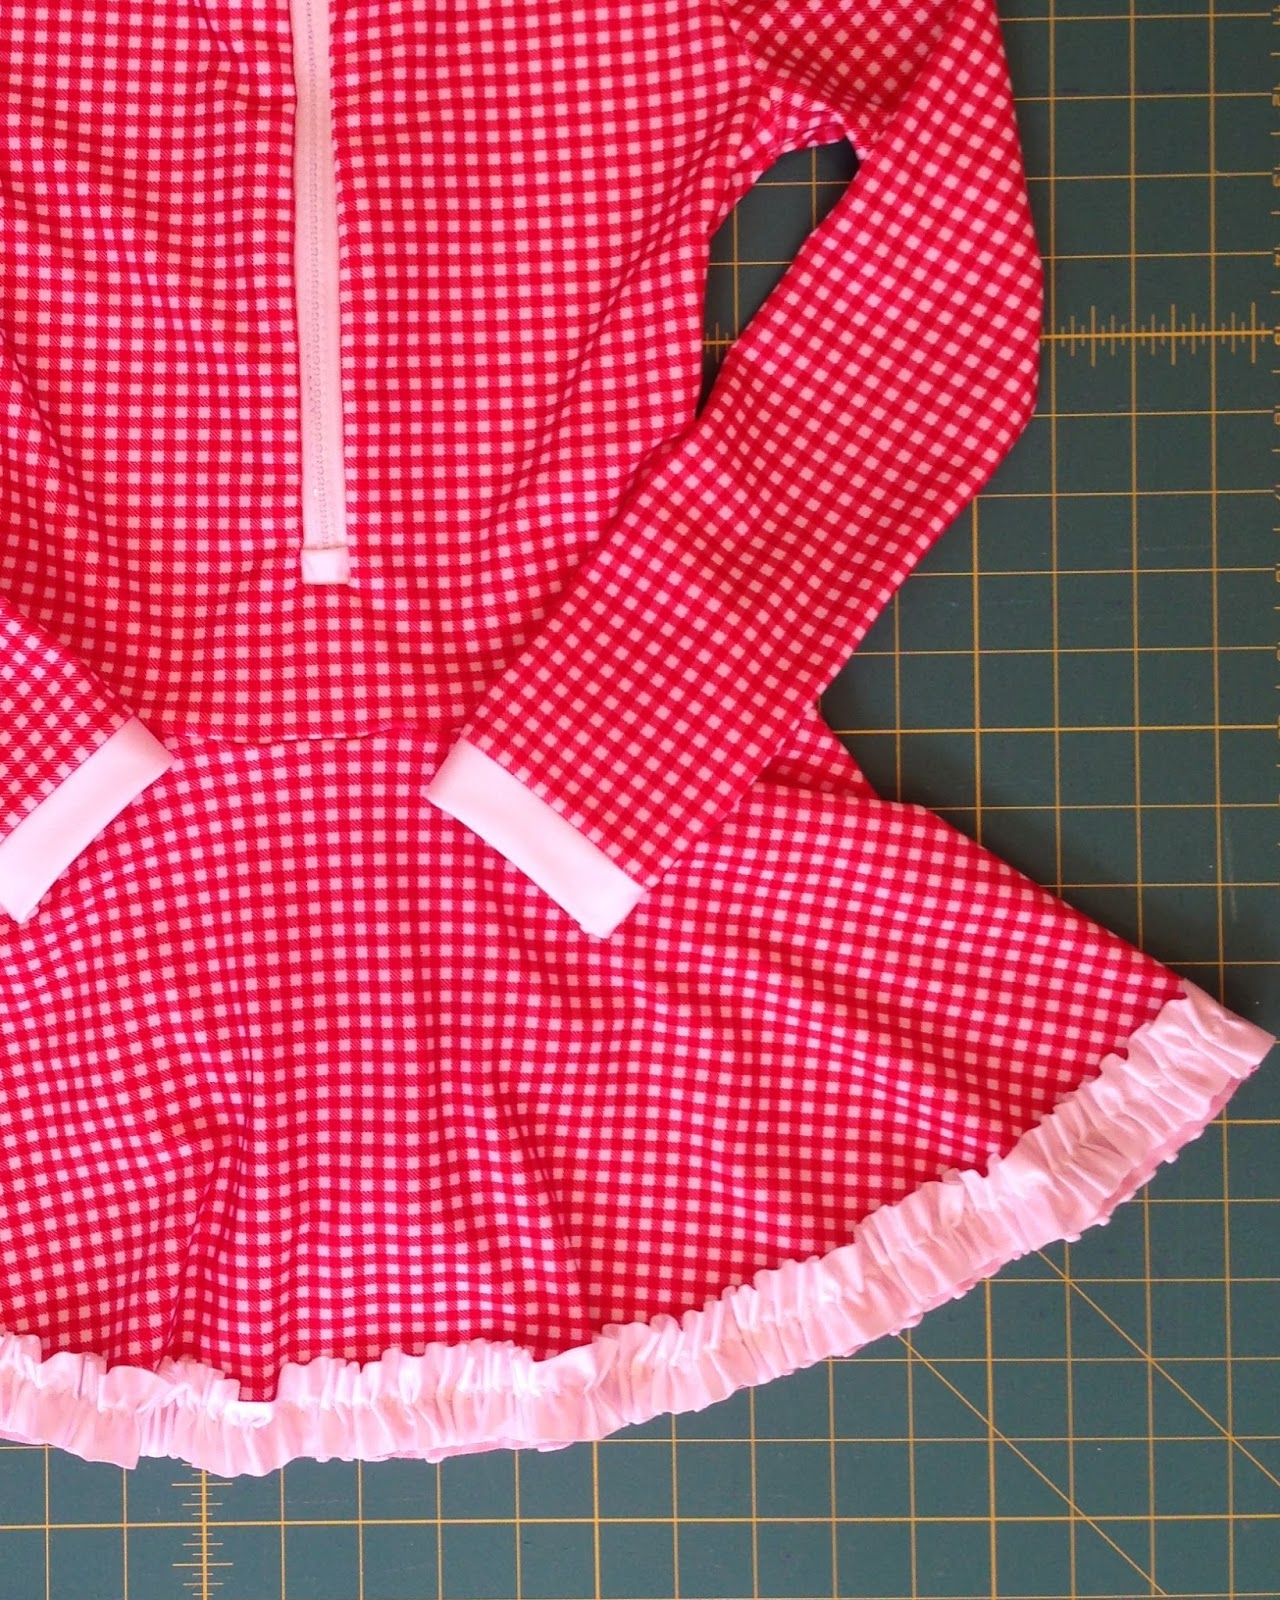
The image above shows the finished swimsuit, however, it does look like it needs a little more to complete the look in this fabric and we have decided it needs a ruffle on the hem. So today I am going to show you how to add a ruffle to the Stinger Bodysuit, which can be utilized on any project made from Lycra.
1. Firstly, measure the hem of the area you will be adding the ruffle to.
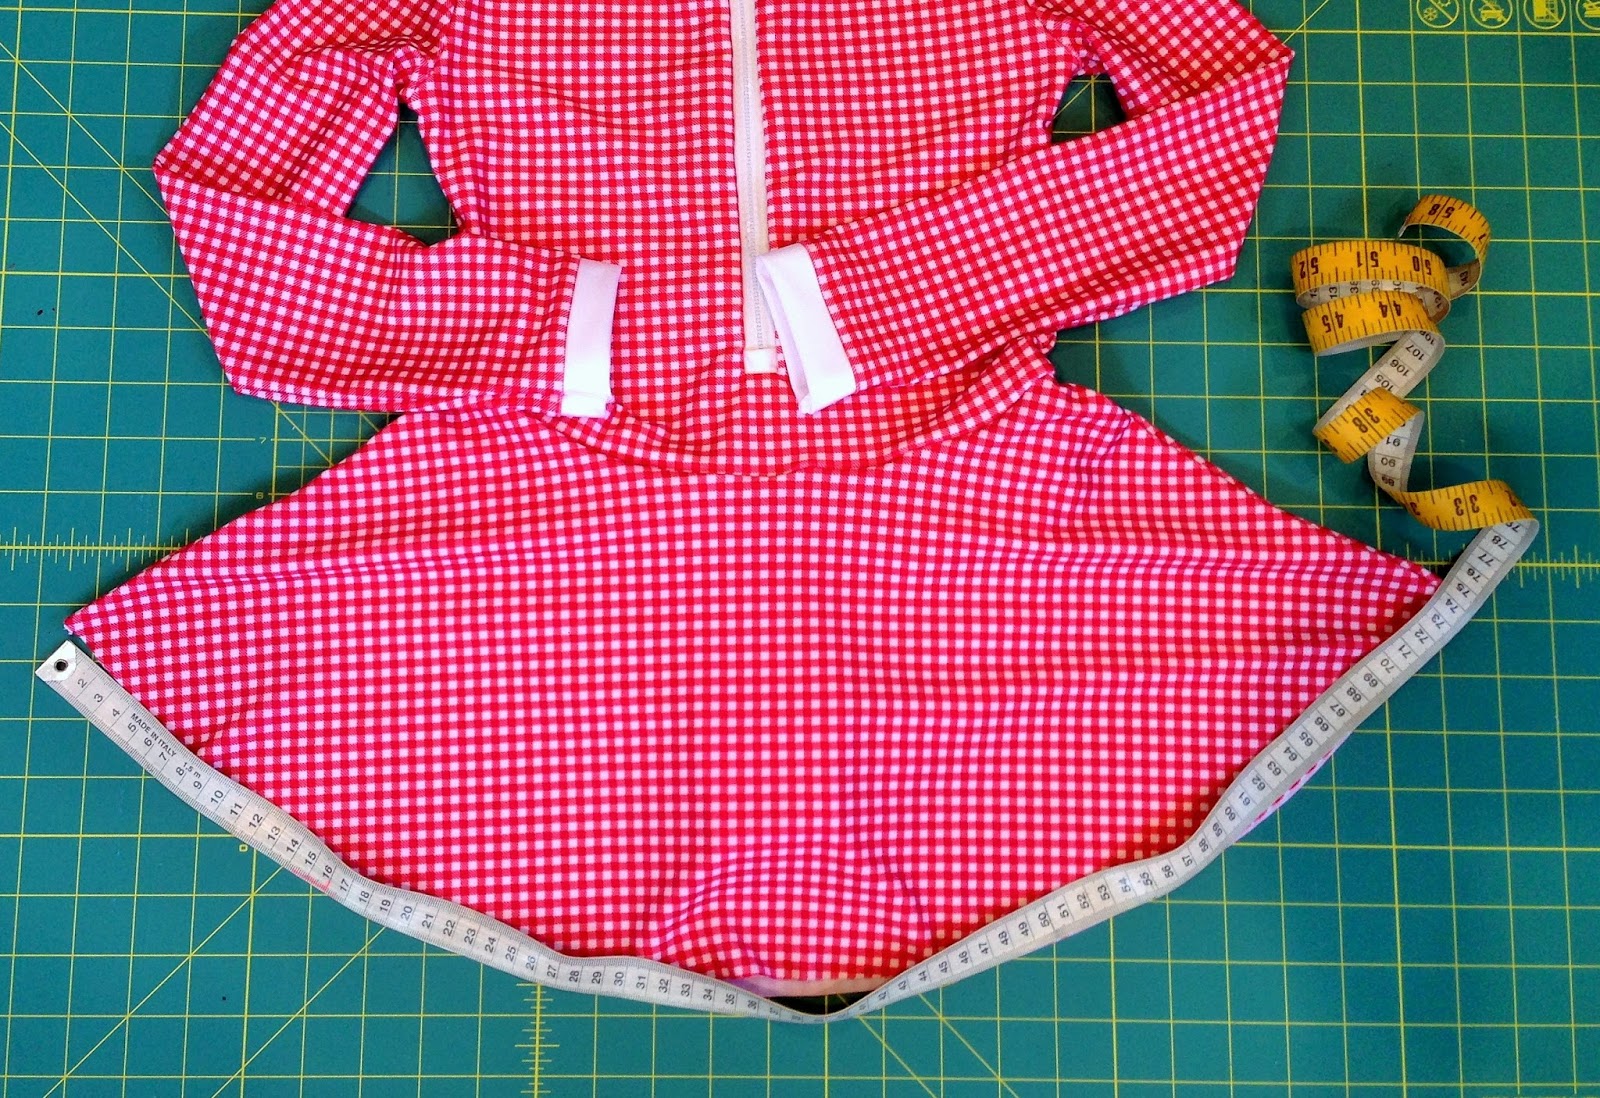
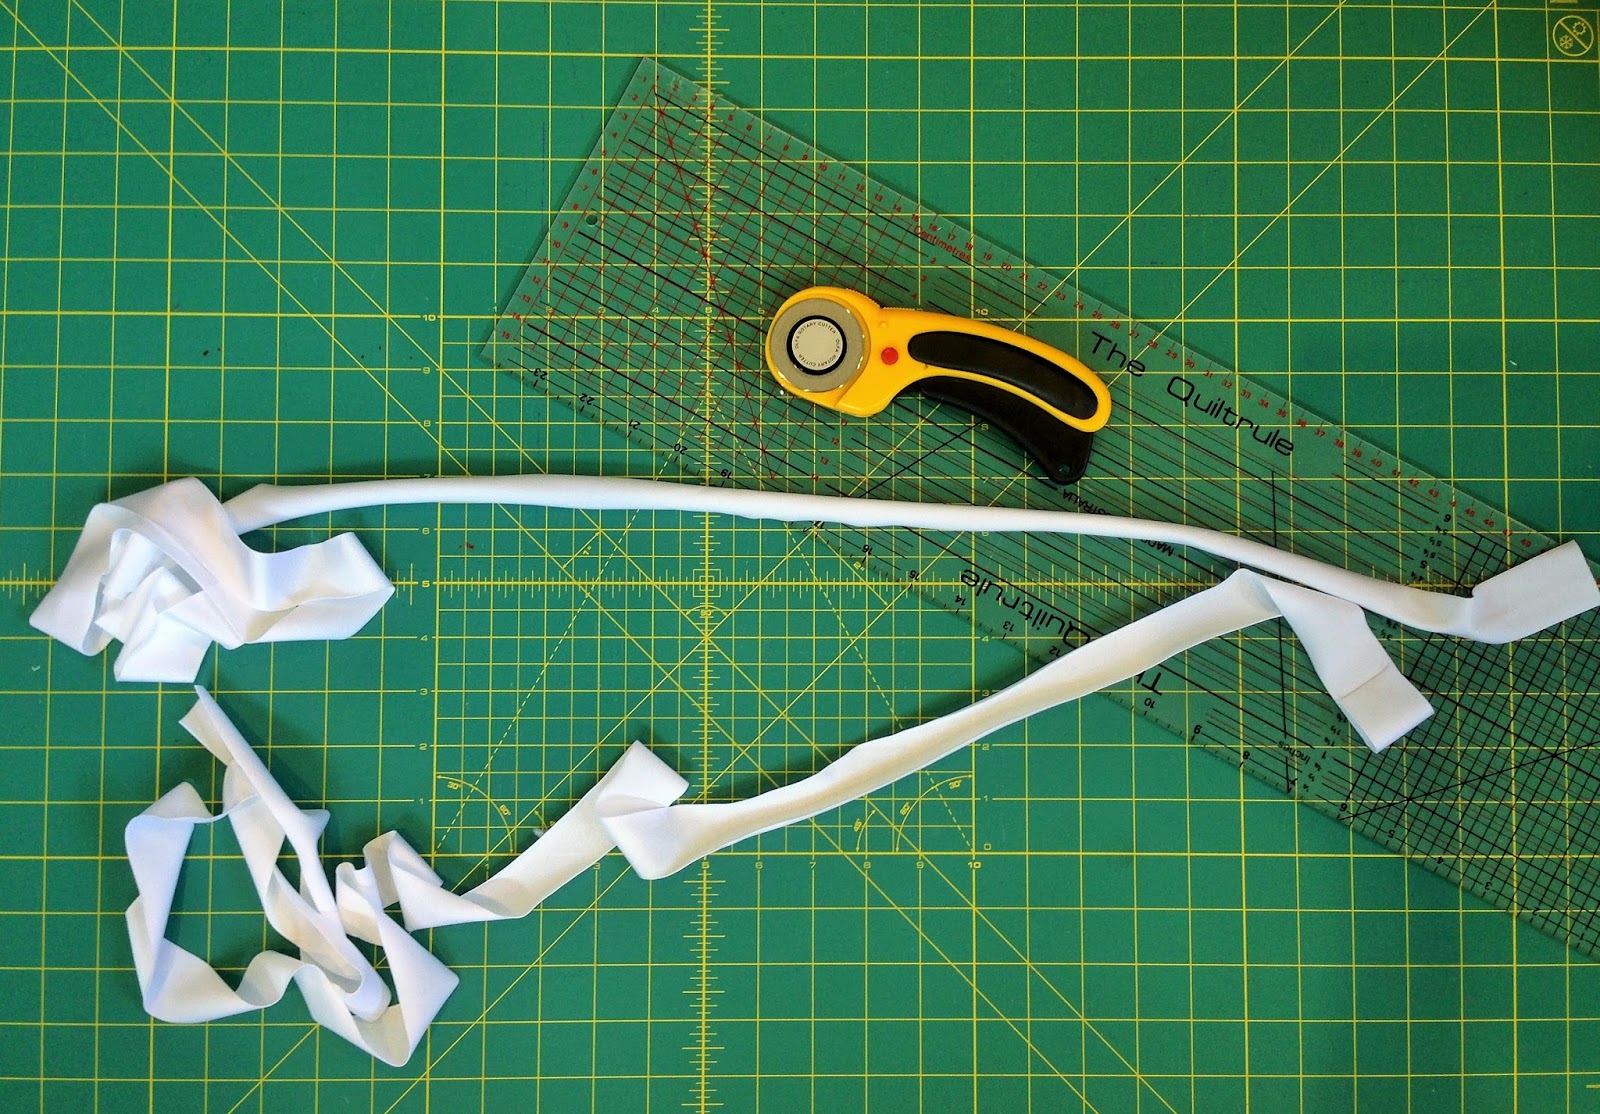
2. Next cut the strips to be ruffled at 1 1/4″ or 3cm wide. These strips need to be cut with the longest measurement going from selvage to selvage 2 1/2 times the garment length measured. The total circumference of fabric required was too long for the width of fabric, so I cut 2 1/2 times the front for the front strip and 2 1/2 times the back for the back strip.
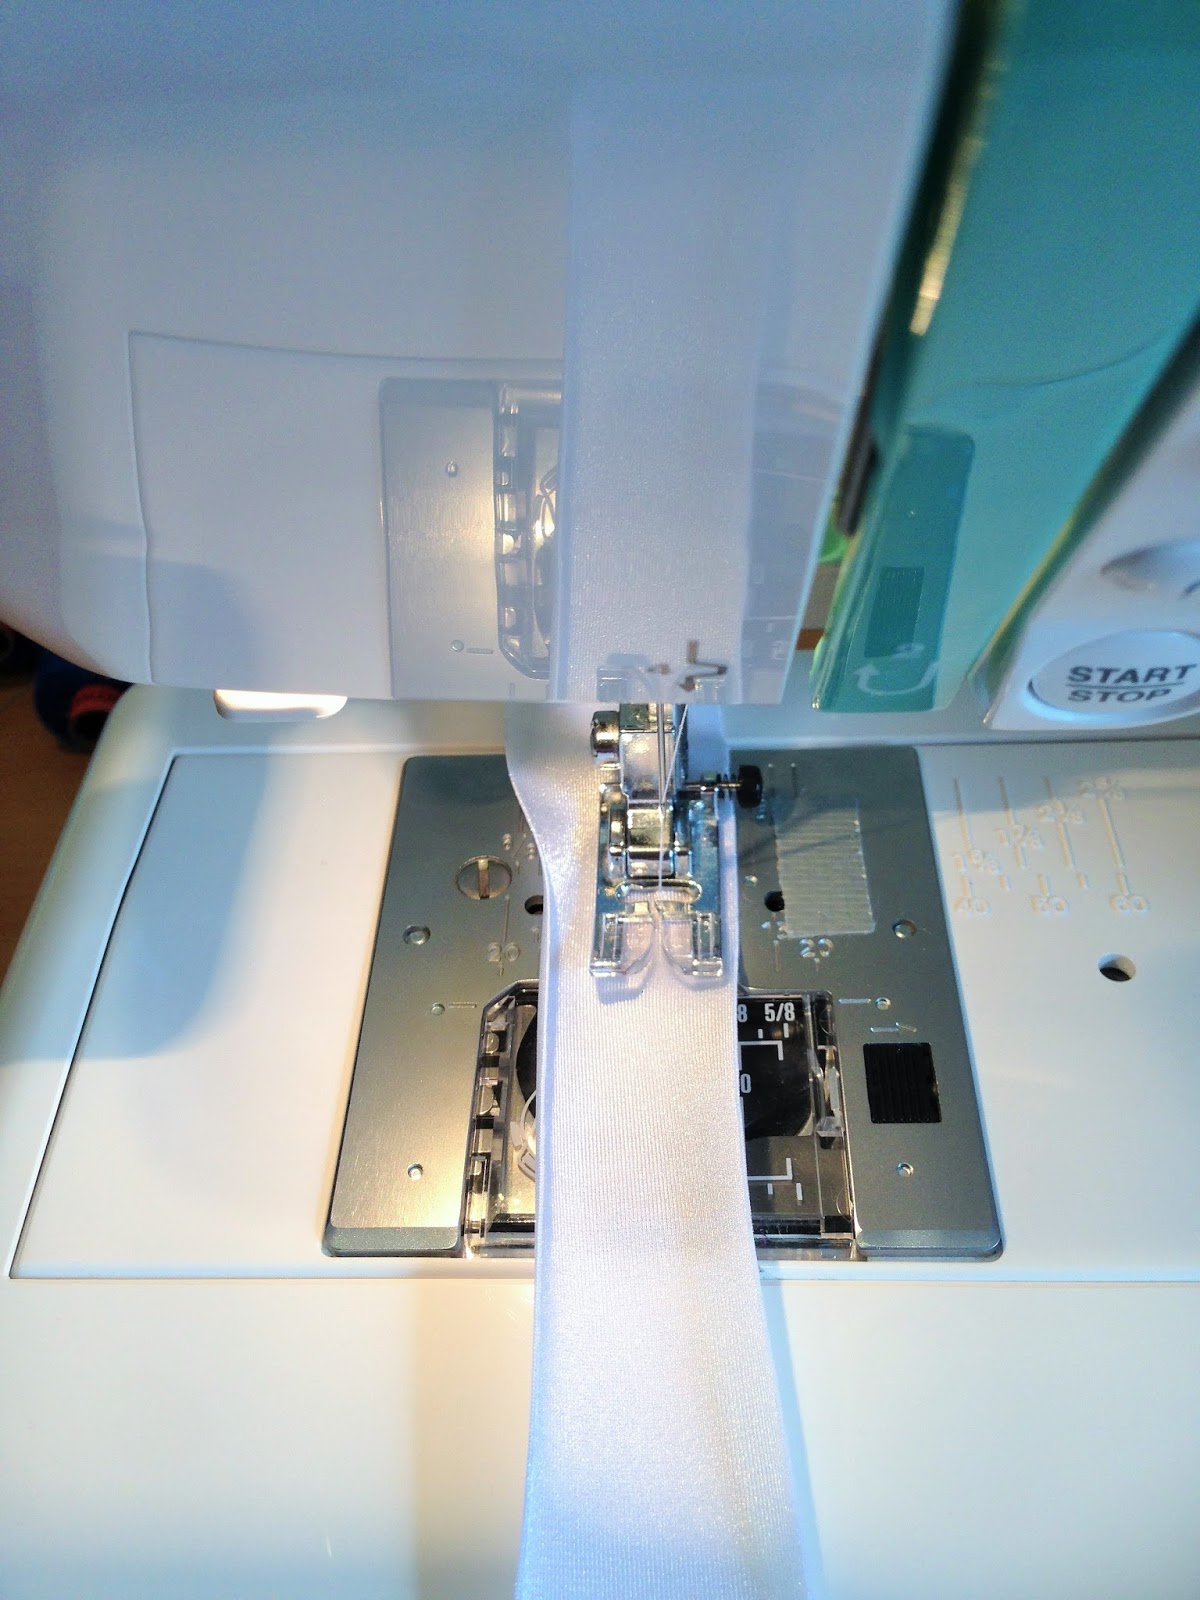
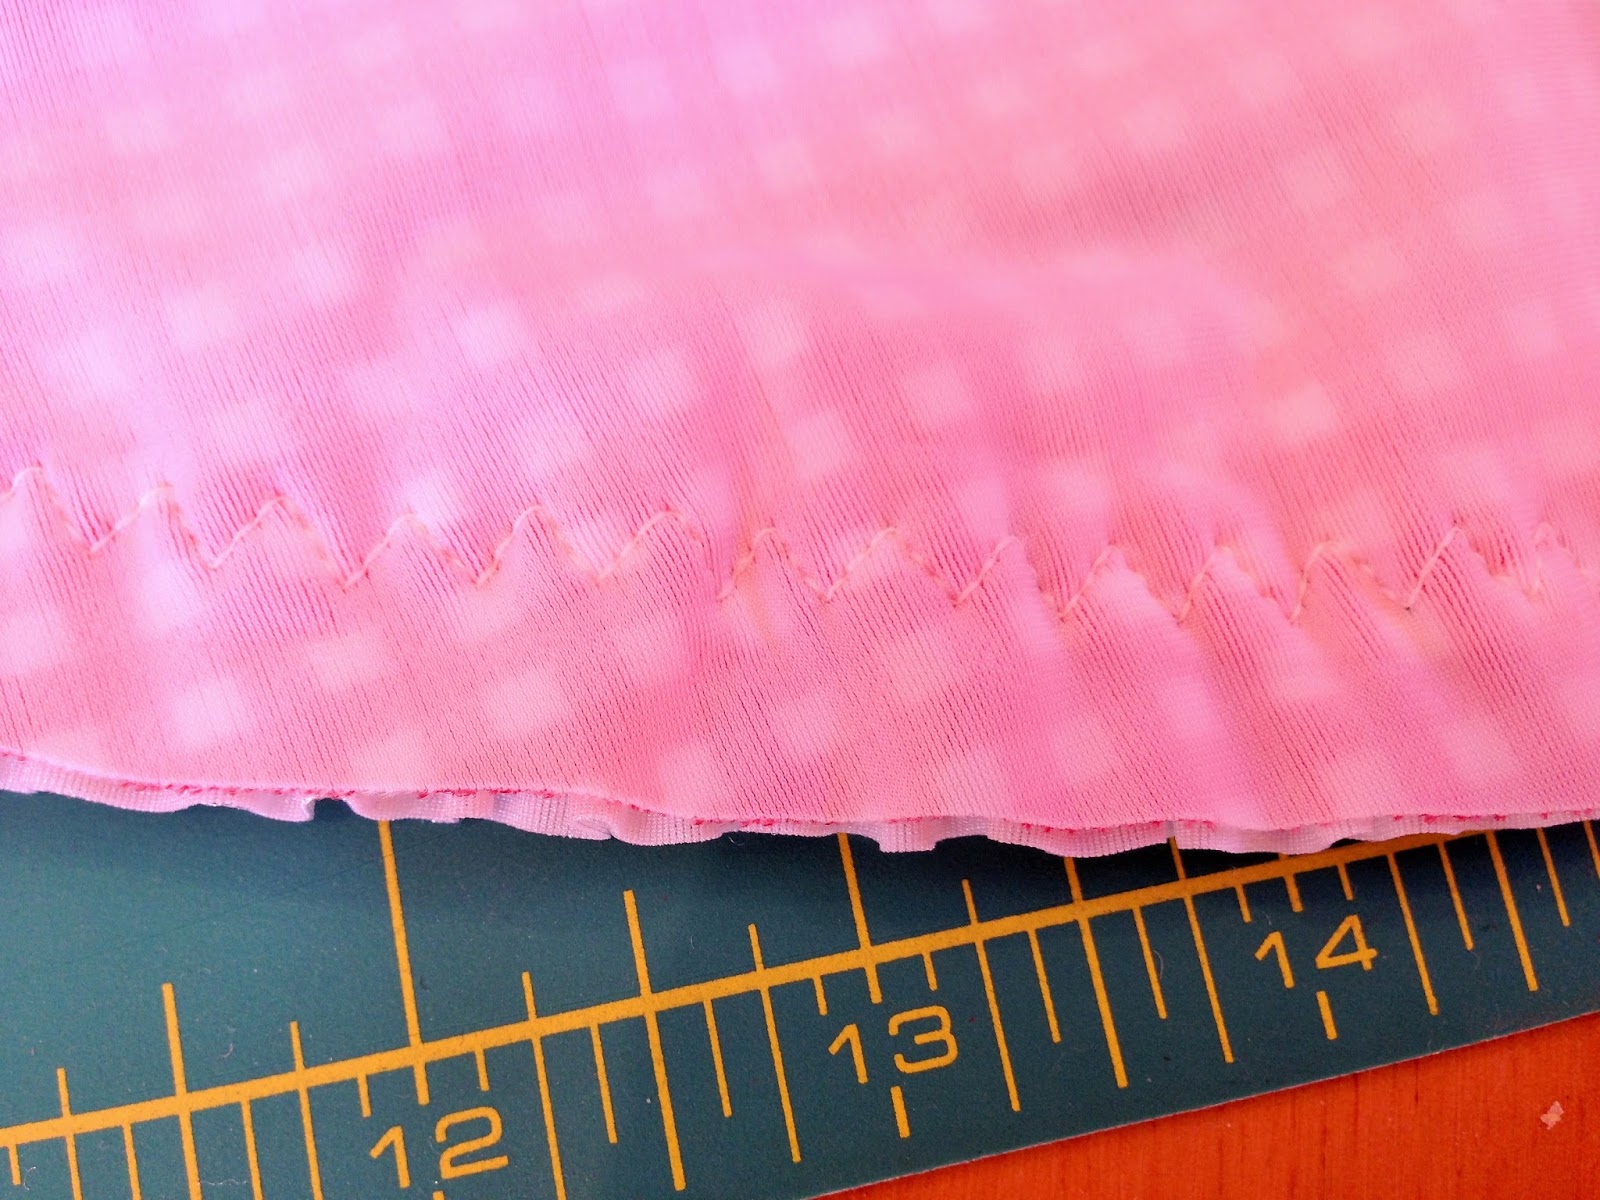
3. Now run a gathering stitch along the left and right edge of our strips of fabric. Start by putting your machine on the longest straight stitch possible. Then line up the right edge and sew 3/8″ or 1cm in from the edge, as shown below.
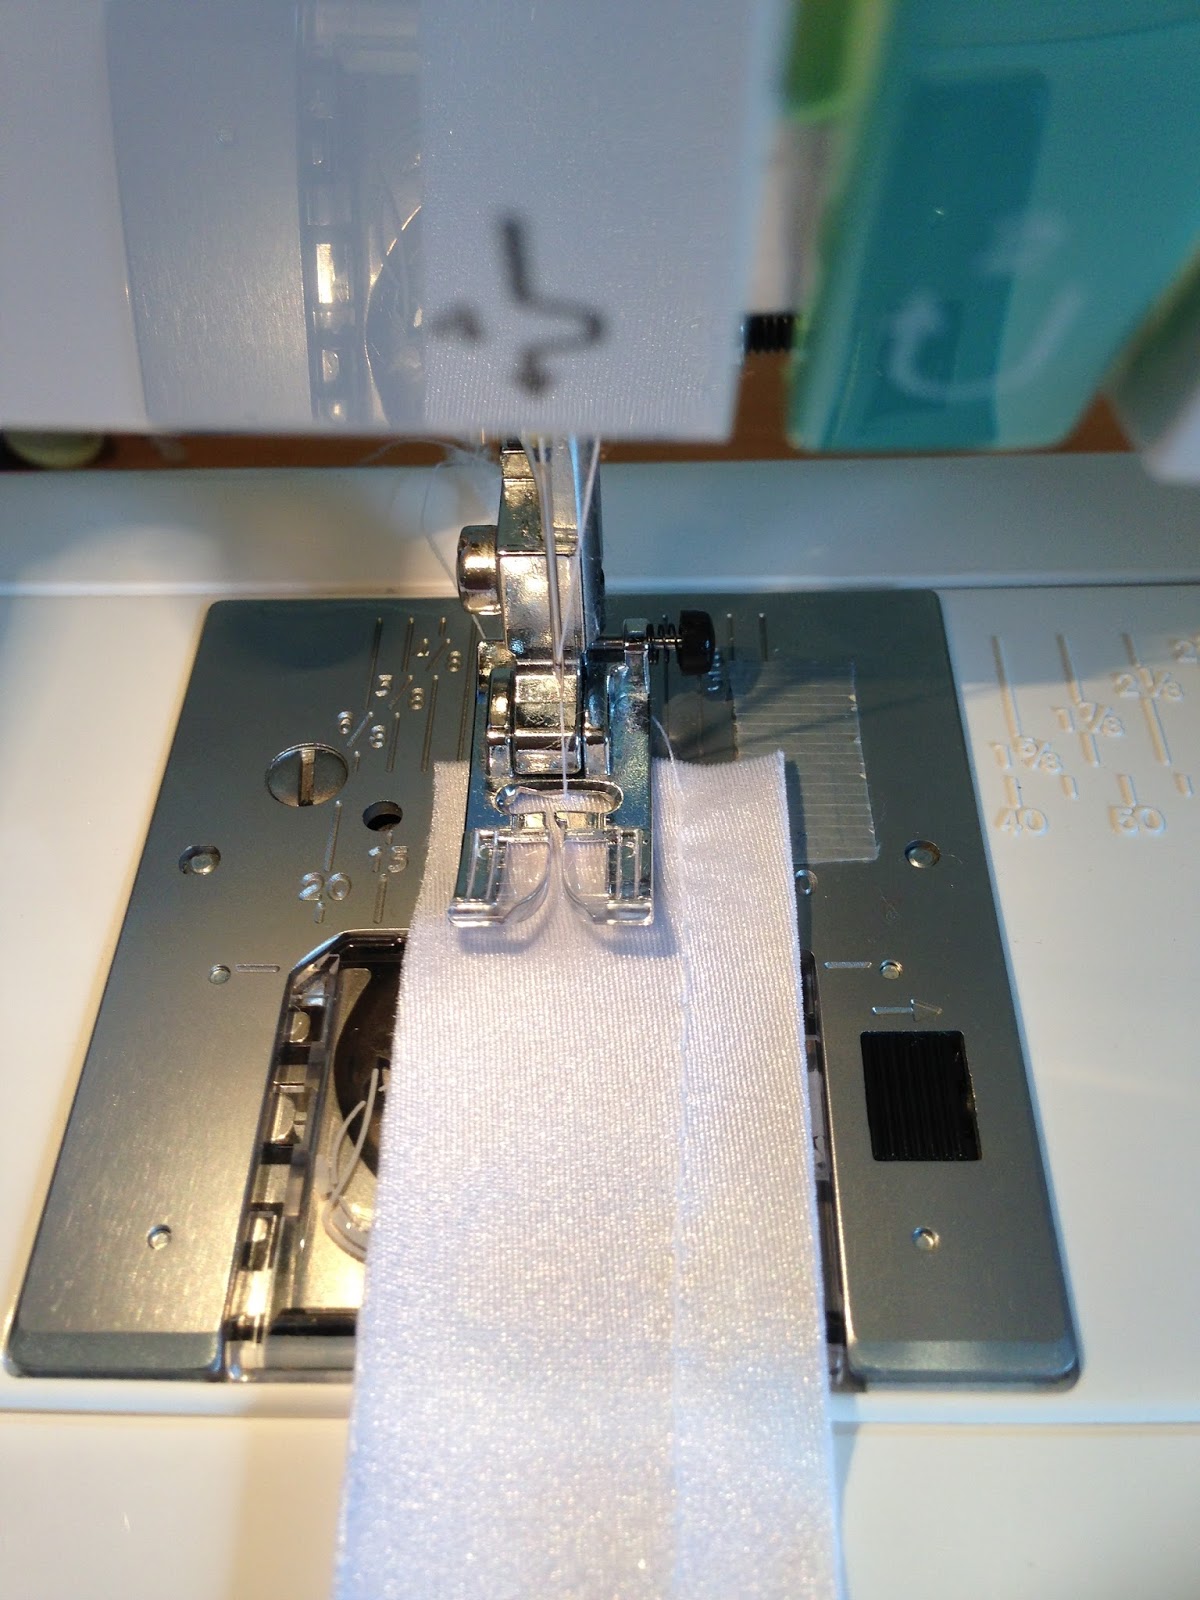
4. Next with the left side under the pressure foot sew the second row of gathering, again this is done 3/8″ or 1cm in from the edge, as shown below.
5. Now pull up the gathering stitches on your strips of fabric, pulling on the bobbin threads only. Pull the threads so that they gather evenly along the length and check that they now measure the correct length to fit onto the area you wish for them to attach to.
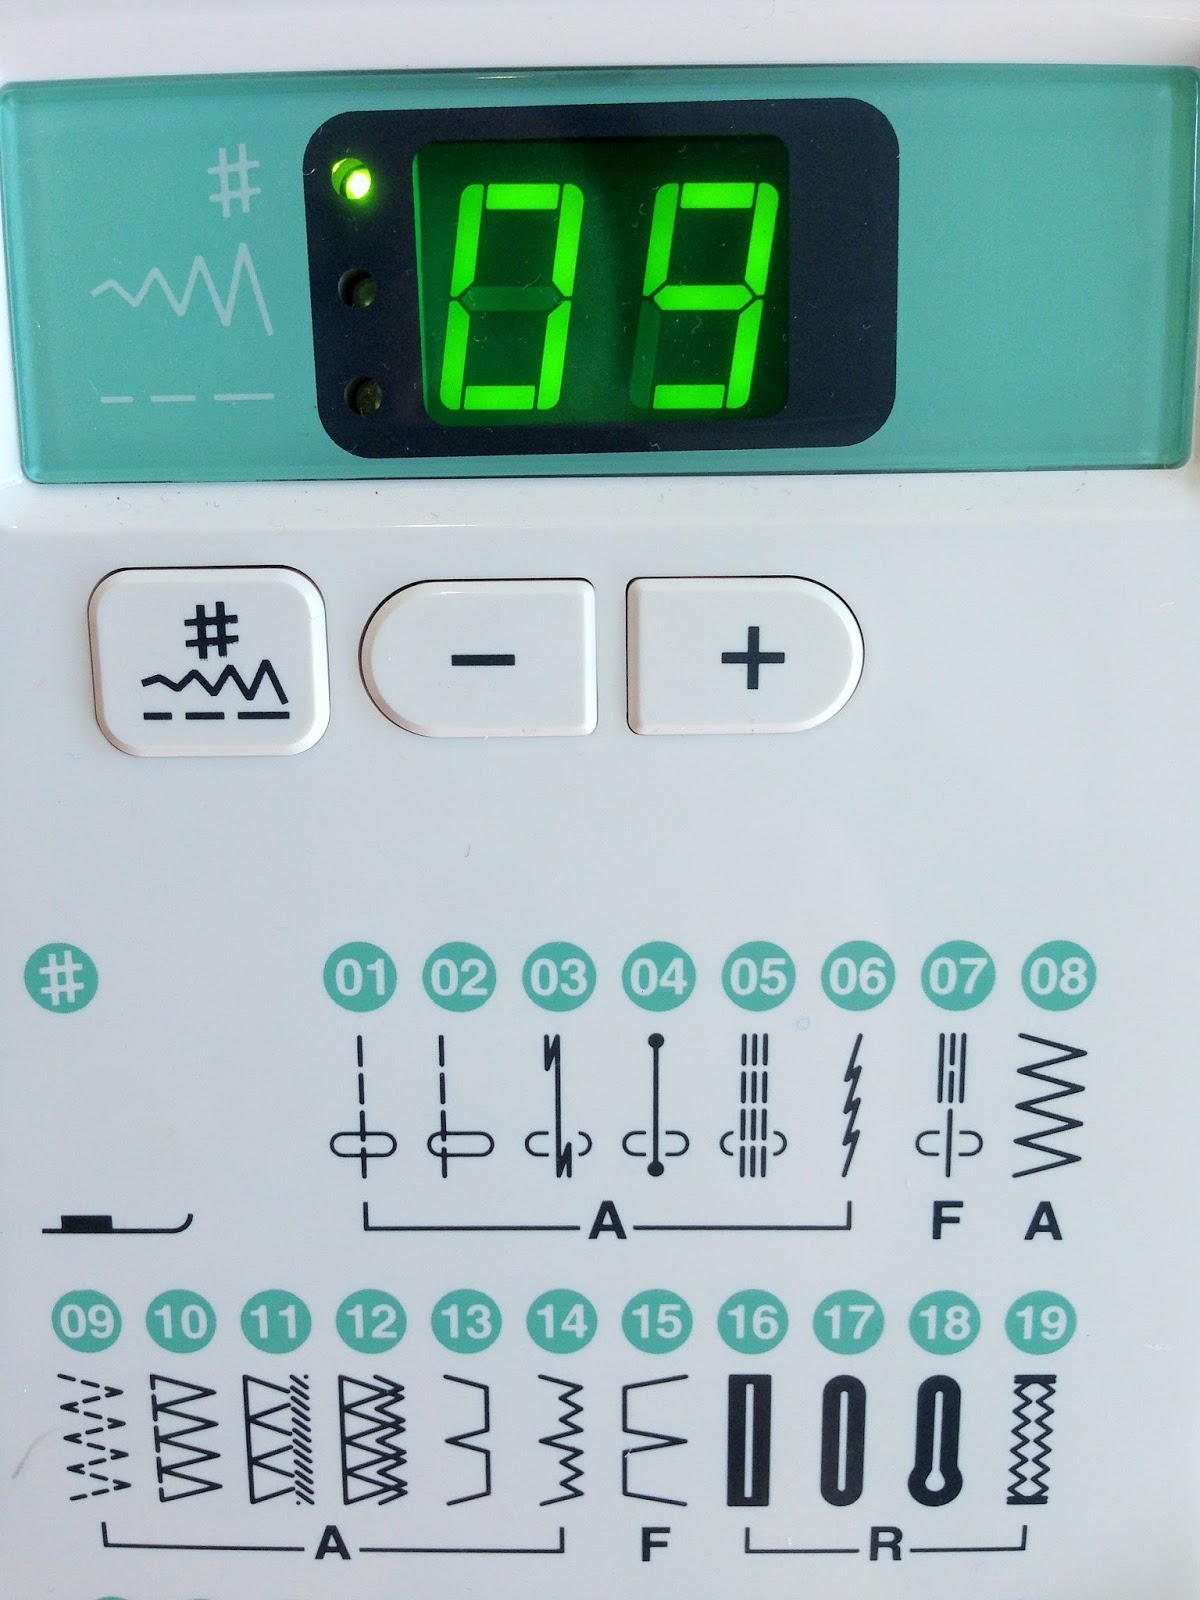
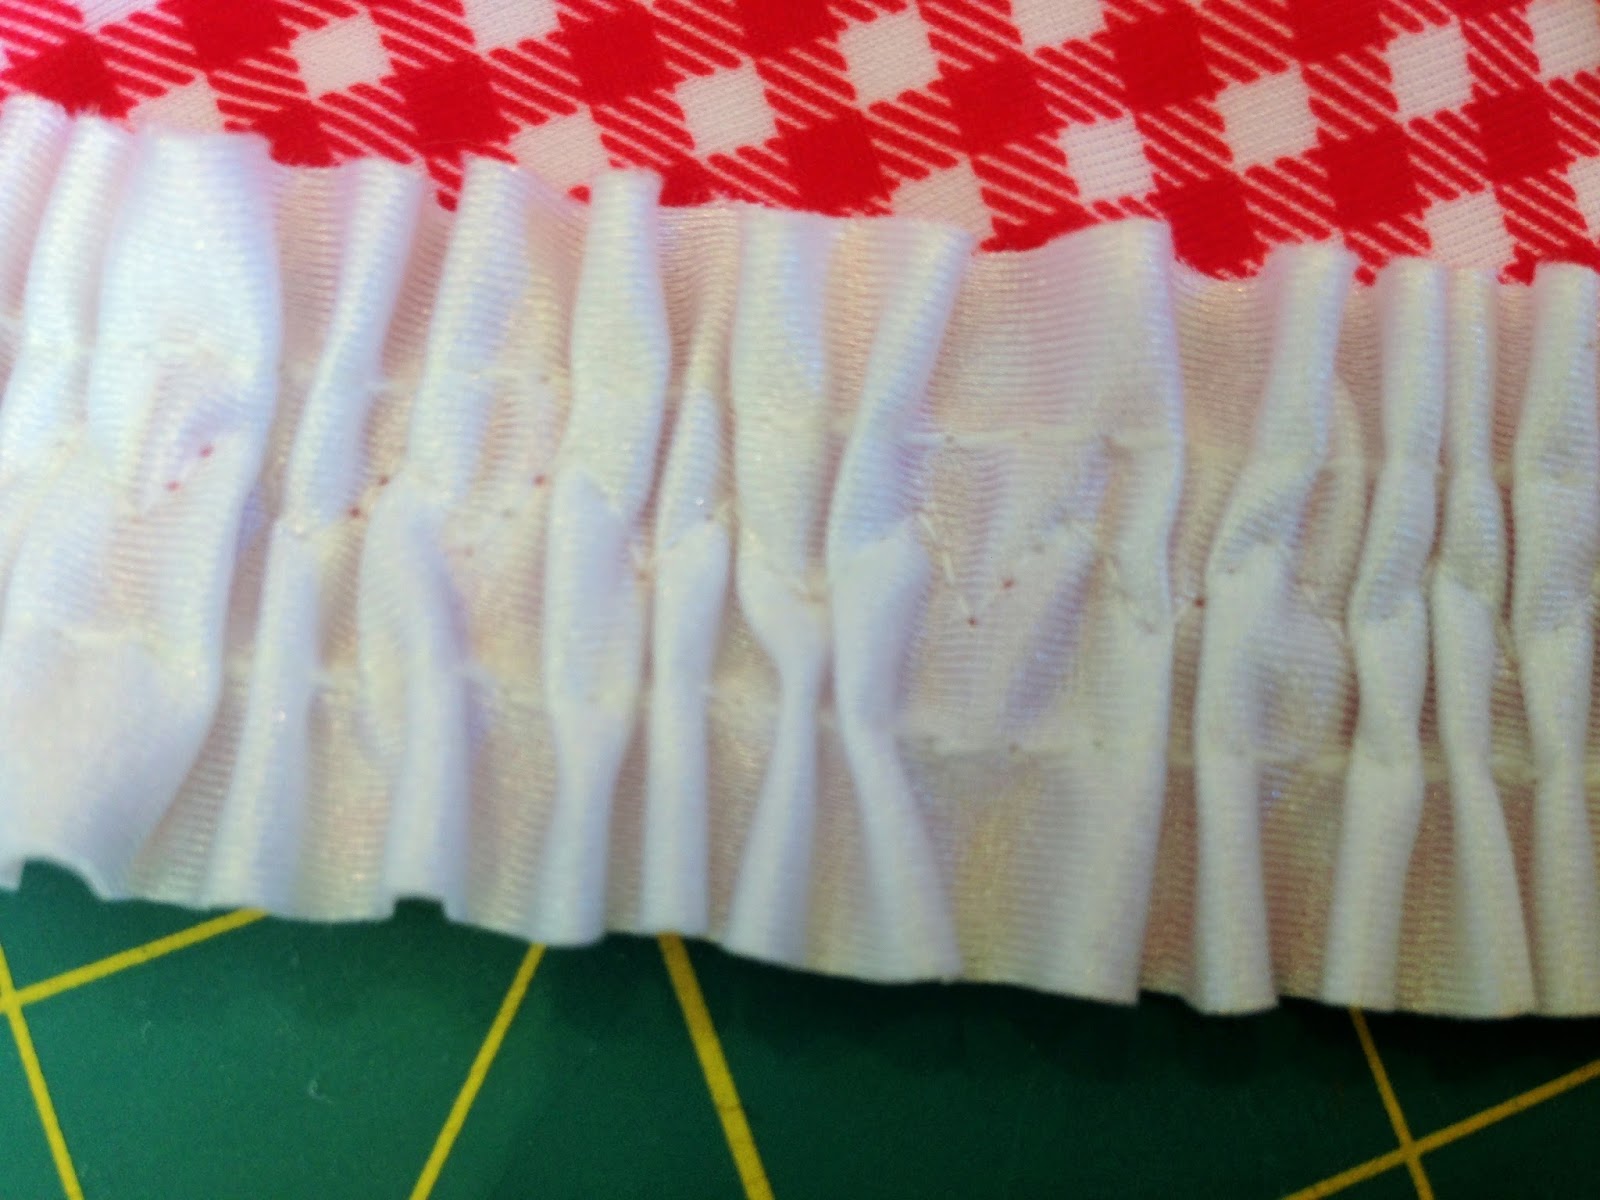
6. Next, change your machine to a wide zig-zag stitch, or in this case I used a 3 step zig zag. The reason you will use a zig-zag is because the ruffle is being added onto stretch fabric and if we use a straight stitch it will be more prone to cracking or getting damaged if the area is pulled whilst being worn.
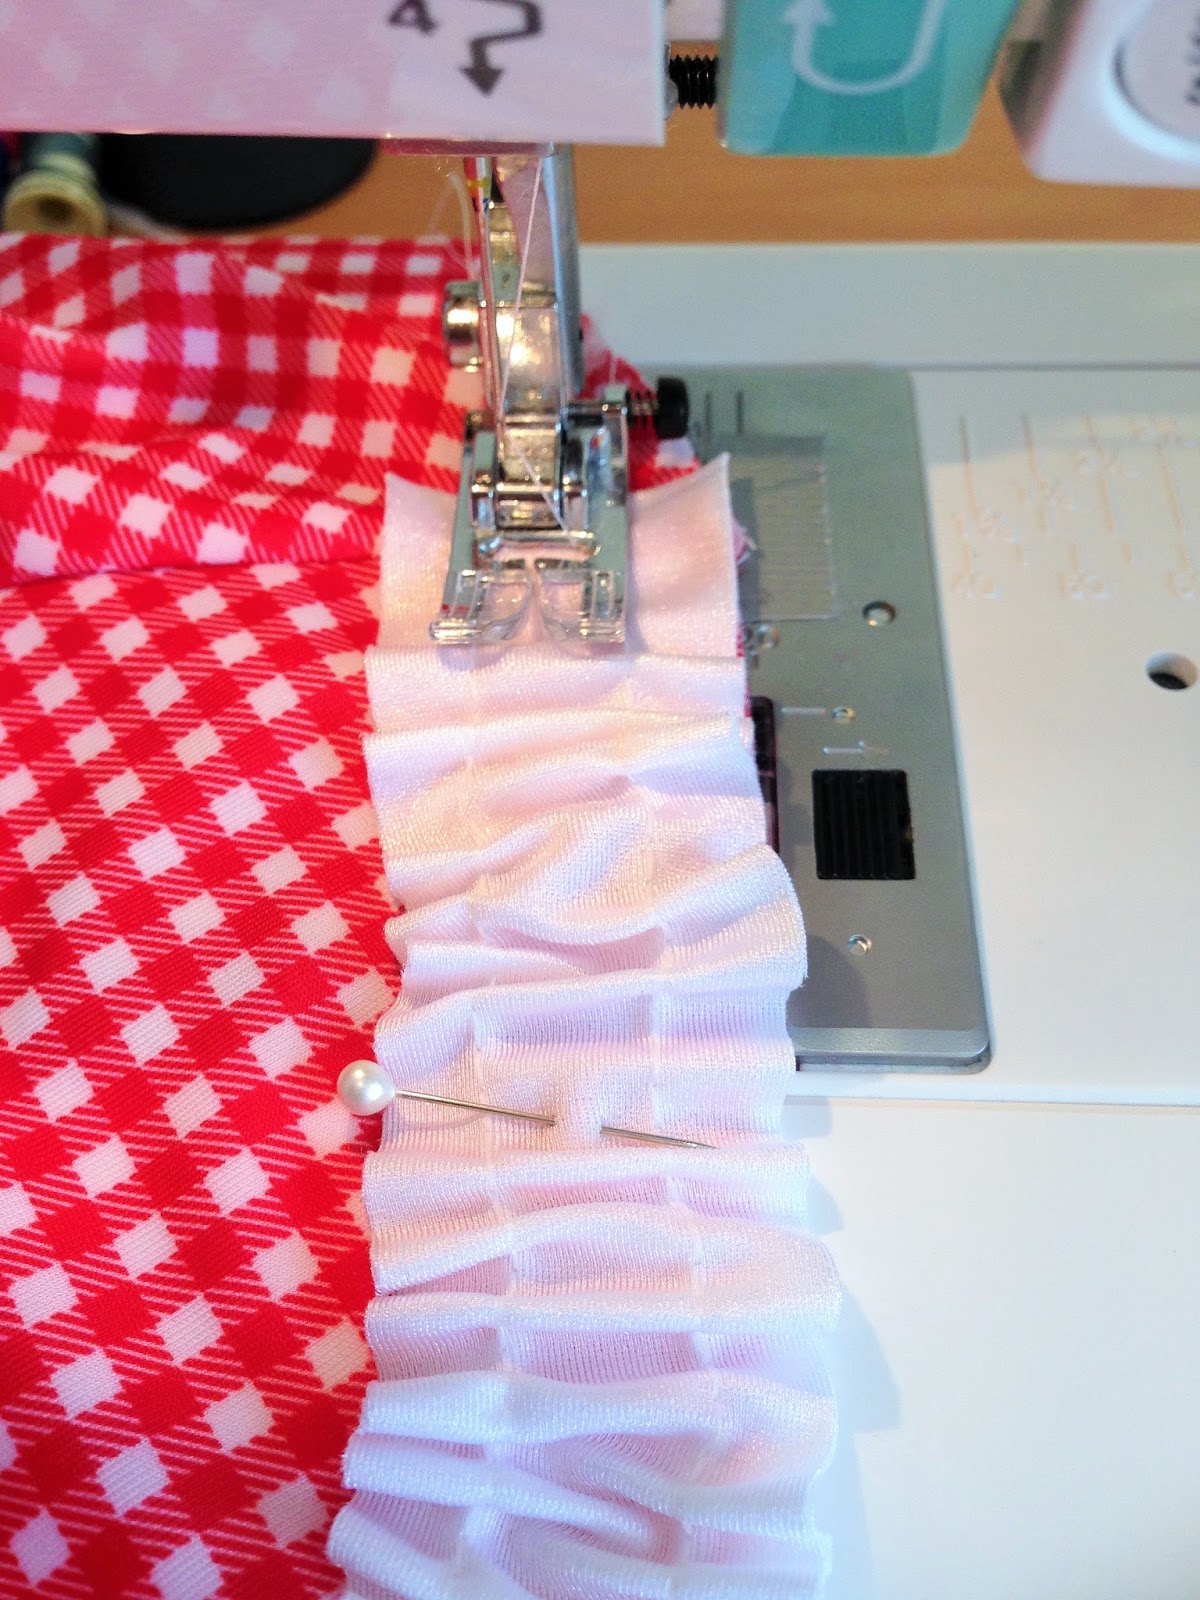
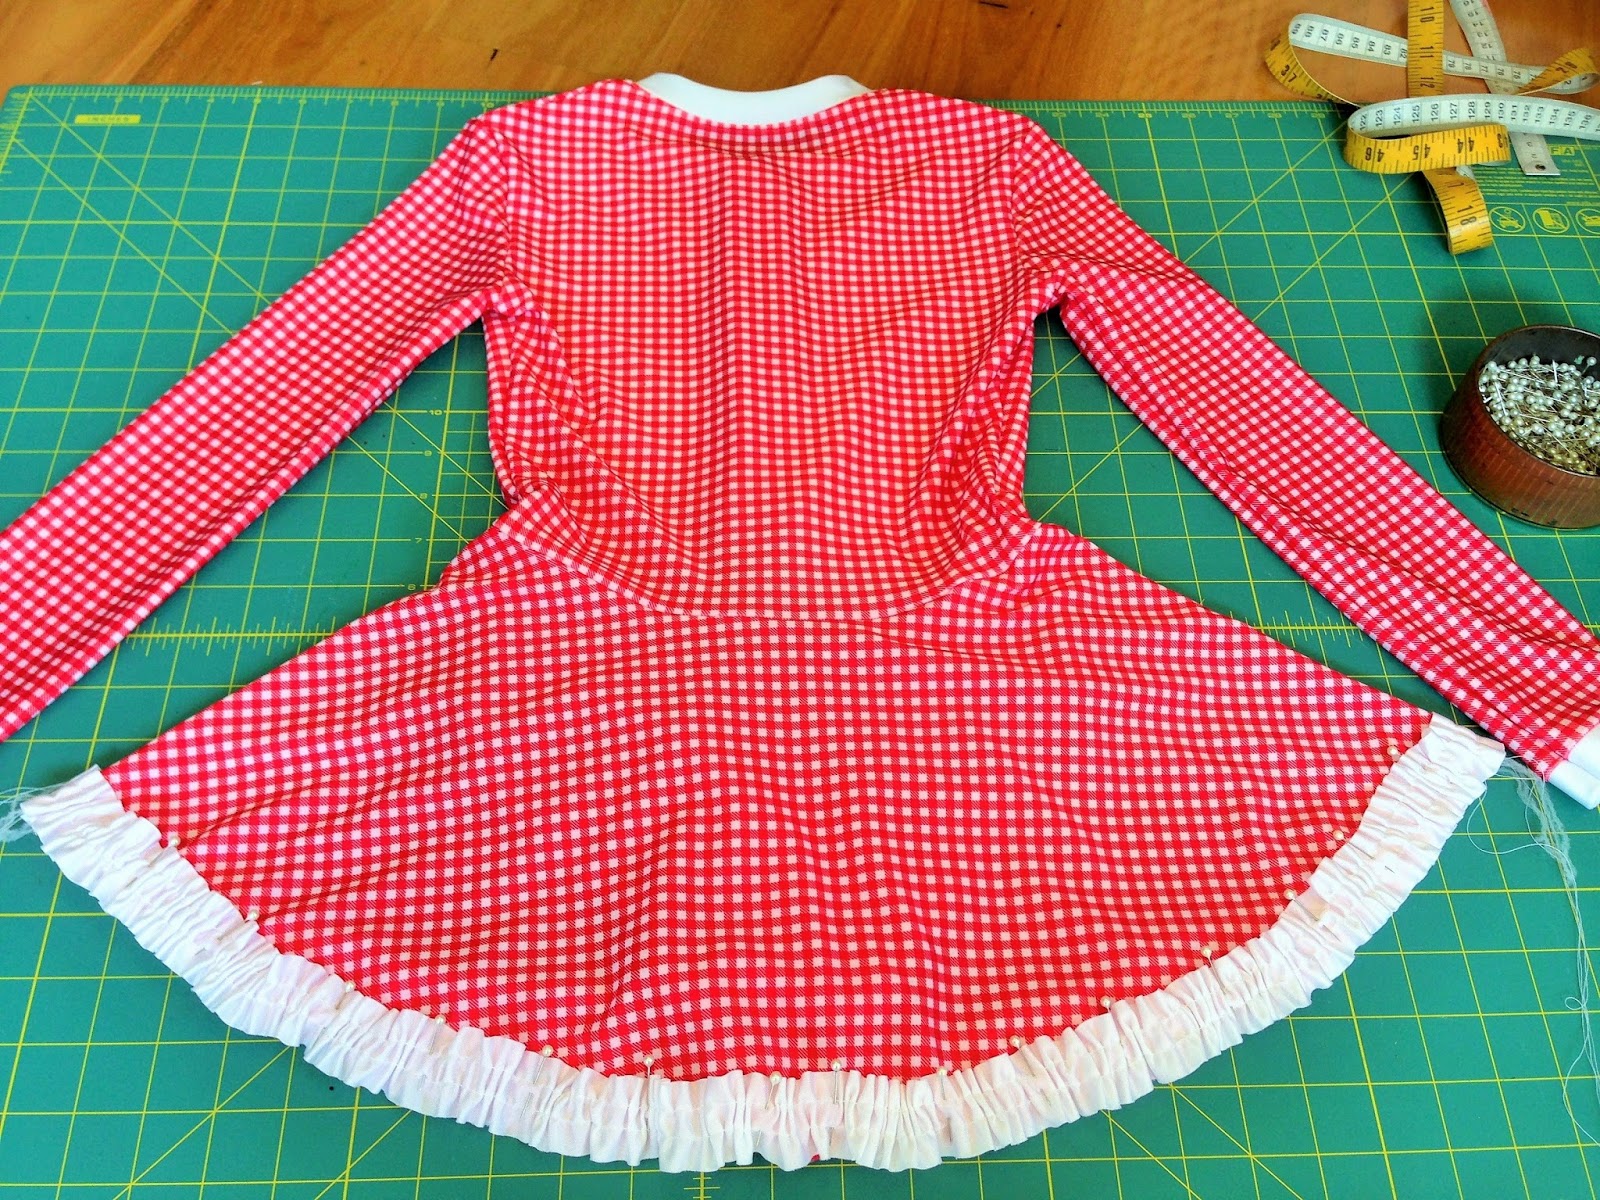
7. Pin your ruffle to the area that you are attaching it to. To begin sewing place the ruffle under the foot of the machine and let 3/8″ or 1cm overlap the side seam of the skirt. Start your sewing 3/8″ or 1cm in from the strip of edge.
Ensure you are sewing your row of zig-zag in the centre of the ruffle strip and do not stretch the skirt as you sew.
8. This how it should look once sewn.
9. This is what the reverse side of the skirt looks like. With the ruffle slightly showing as it covers the raw edge of the skirt.
10. Next place and pin the ruffle to the back of the skirt.
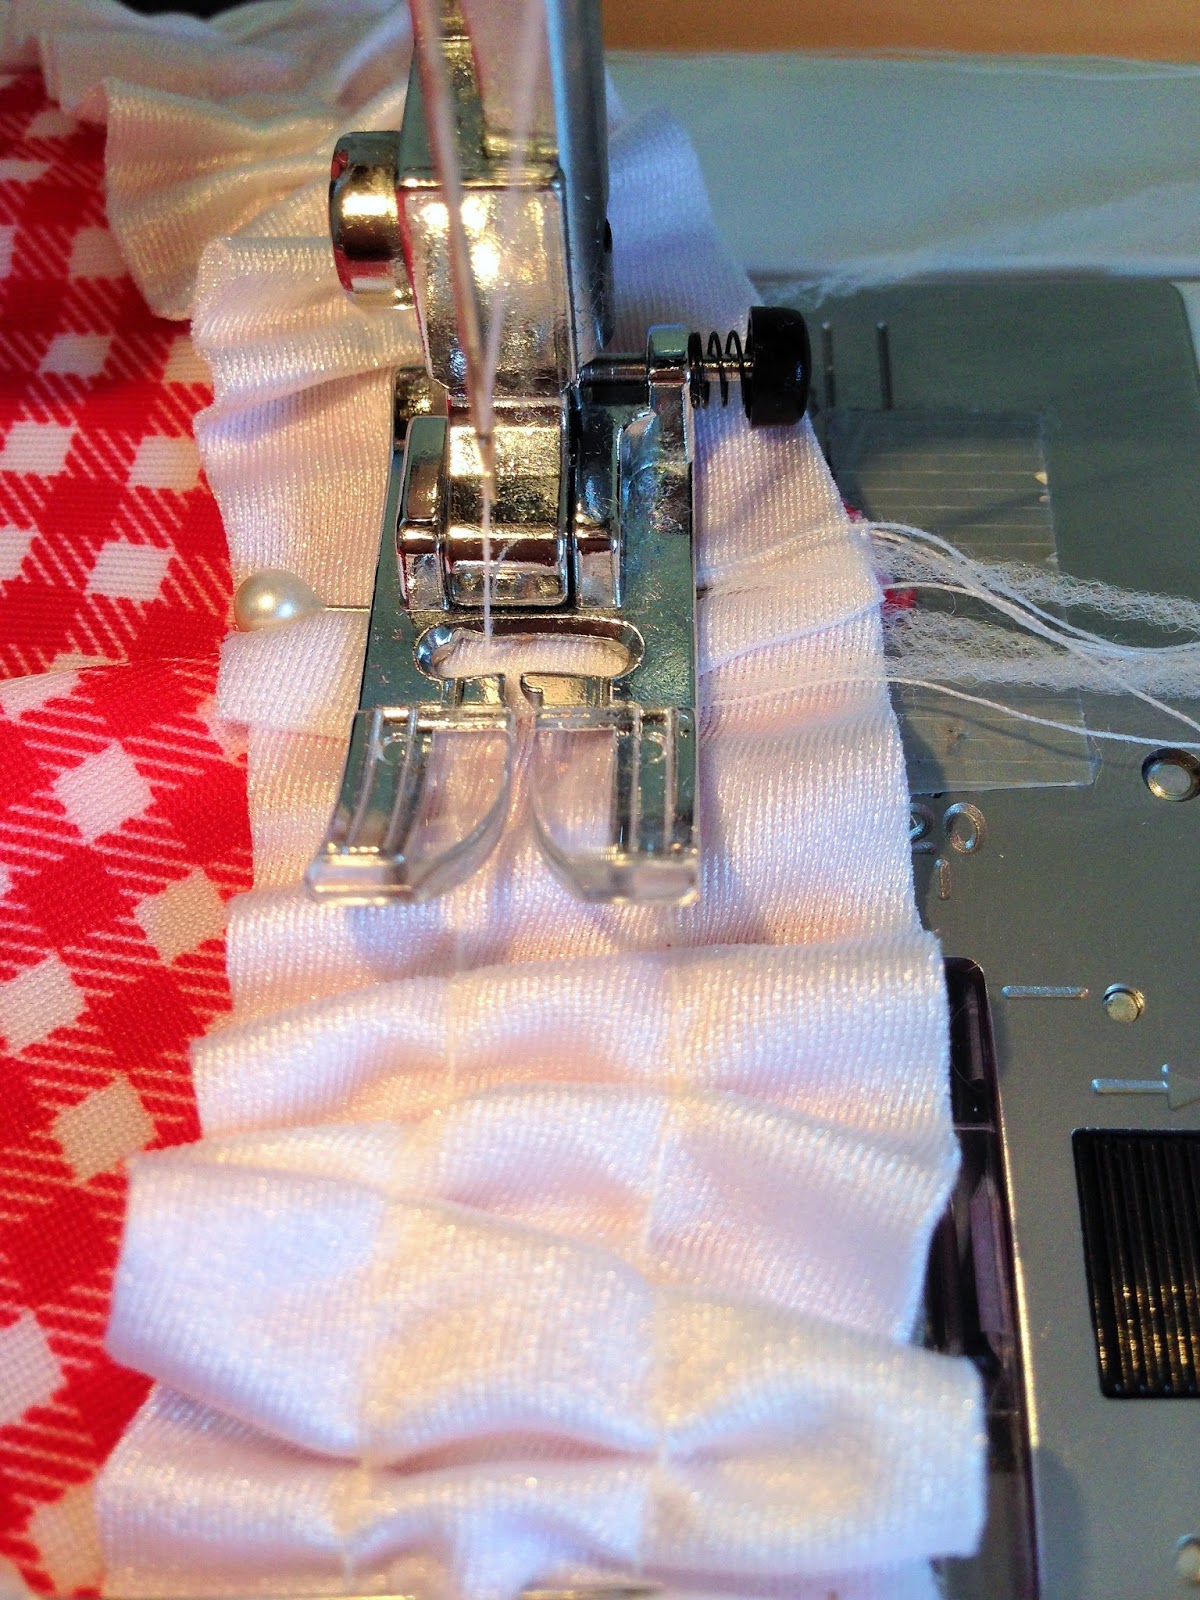
11. To begin sewing the ruffle onto the back tuck the back ruffle under the front 3/8″ or 1cm overlap and continue using your zig-zag to attach.
12. Remove all your gathering stitches and yippee you are done! Easy as that! Now you will want to start ruffling everything in sight.
The complete Stinger Suit can be made by following the instructions that come with the pattern. If you would like to make this suit without a skirt, instructions to eliminate it also come with the pattern. How cute is this fabric?
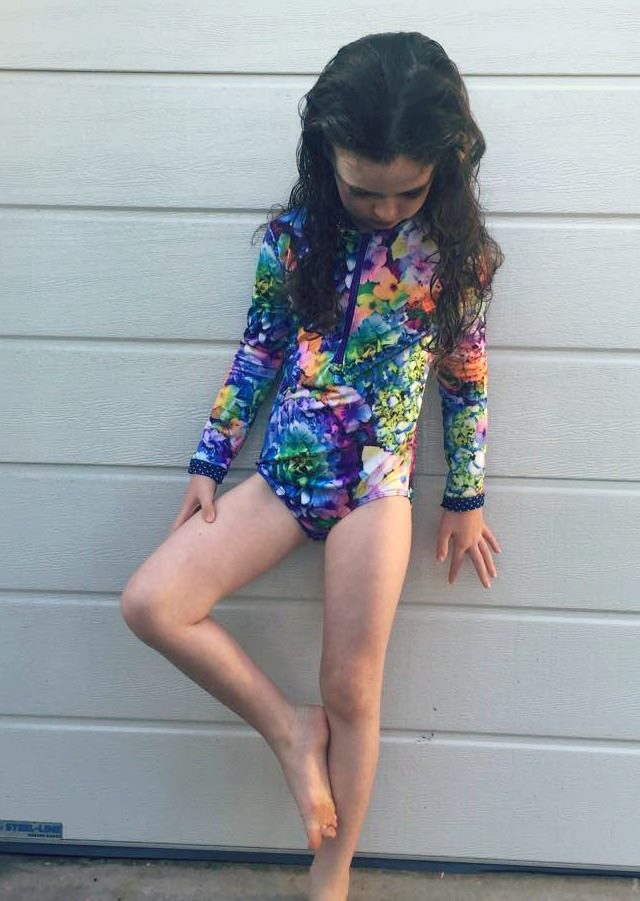
Photo supplied by Laurie McDonnell from Hannah’s Daisy
You can also visit the Sew by Pattern Pieces Sewing Circle to ask questions or gather more sewing inspiration. Thank you for your time today and happy sewing!
Ready to make your own?
Shop for Pattern: Girls Pattern HERE Ladies Pattern HERE
Instagram Hashtag: #stingerbodysuitpdfpattern #sewbypatternpieces
Tester Inspiration: Girls Blog Post Link Ladies Blog Post to come