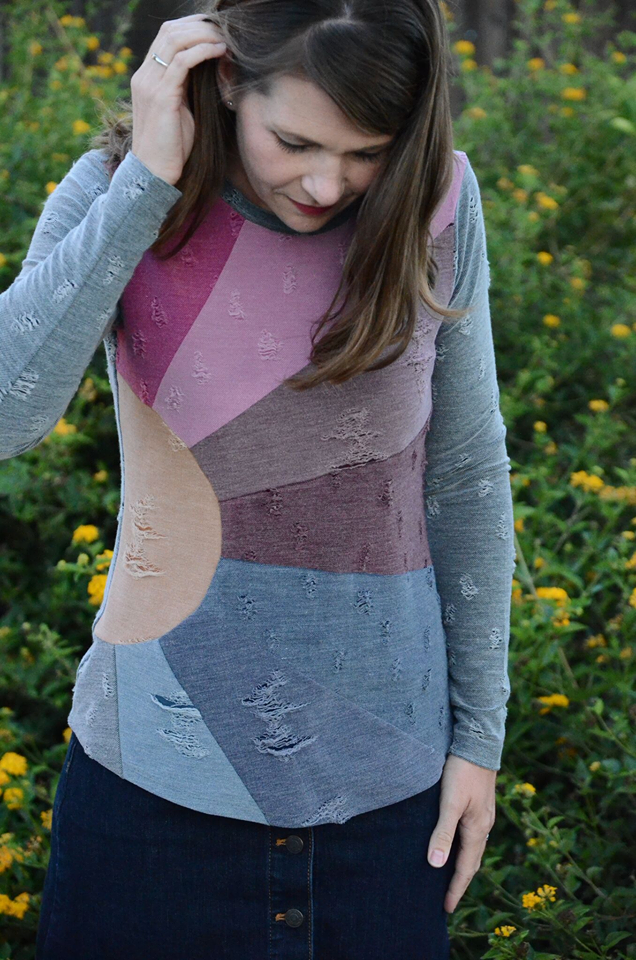
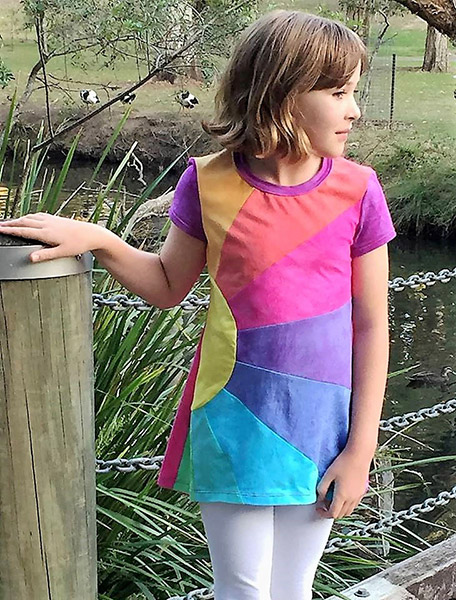
We have Katie to thank for this beautiful post today. She has completed the most outstanding top using the Girls Sunshine Tee Template to adapt one of her favourite t-shirt patterns.
Why not hack the girls’ tee to make one for yourself or with a different t-shirt base pattern. Apply the Sunshine Tee Template to your favourite t-shirt pattern.
As we knew you’d love to see how to do this, as you have been asking in the group, Katie graciously offered to take photos of each step on her top that she was making, so that we can share how she has made this top with us.
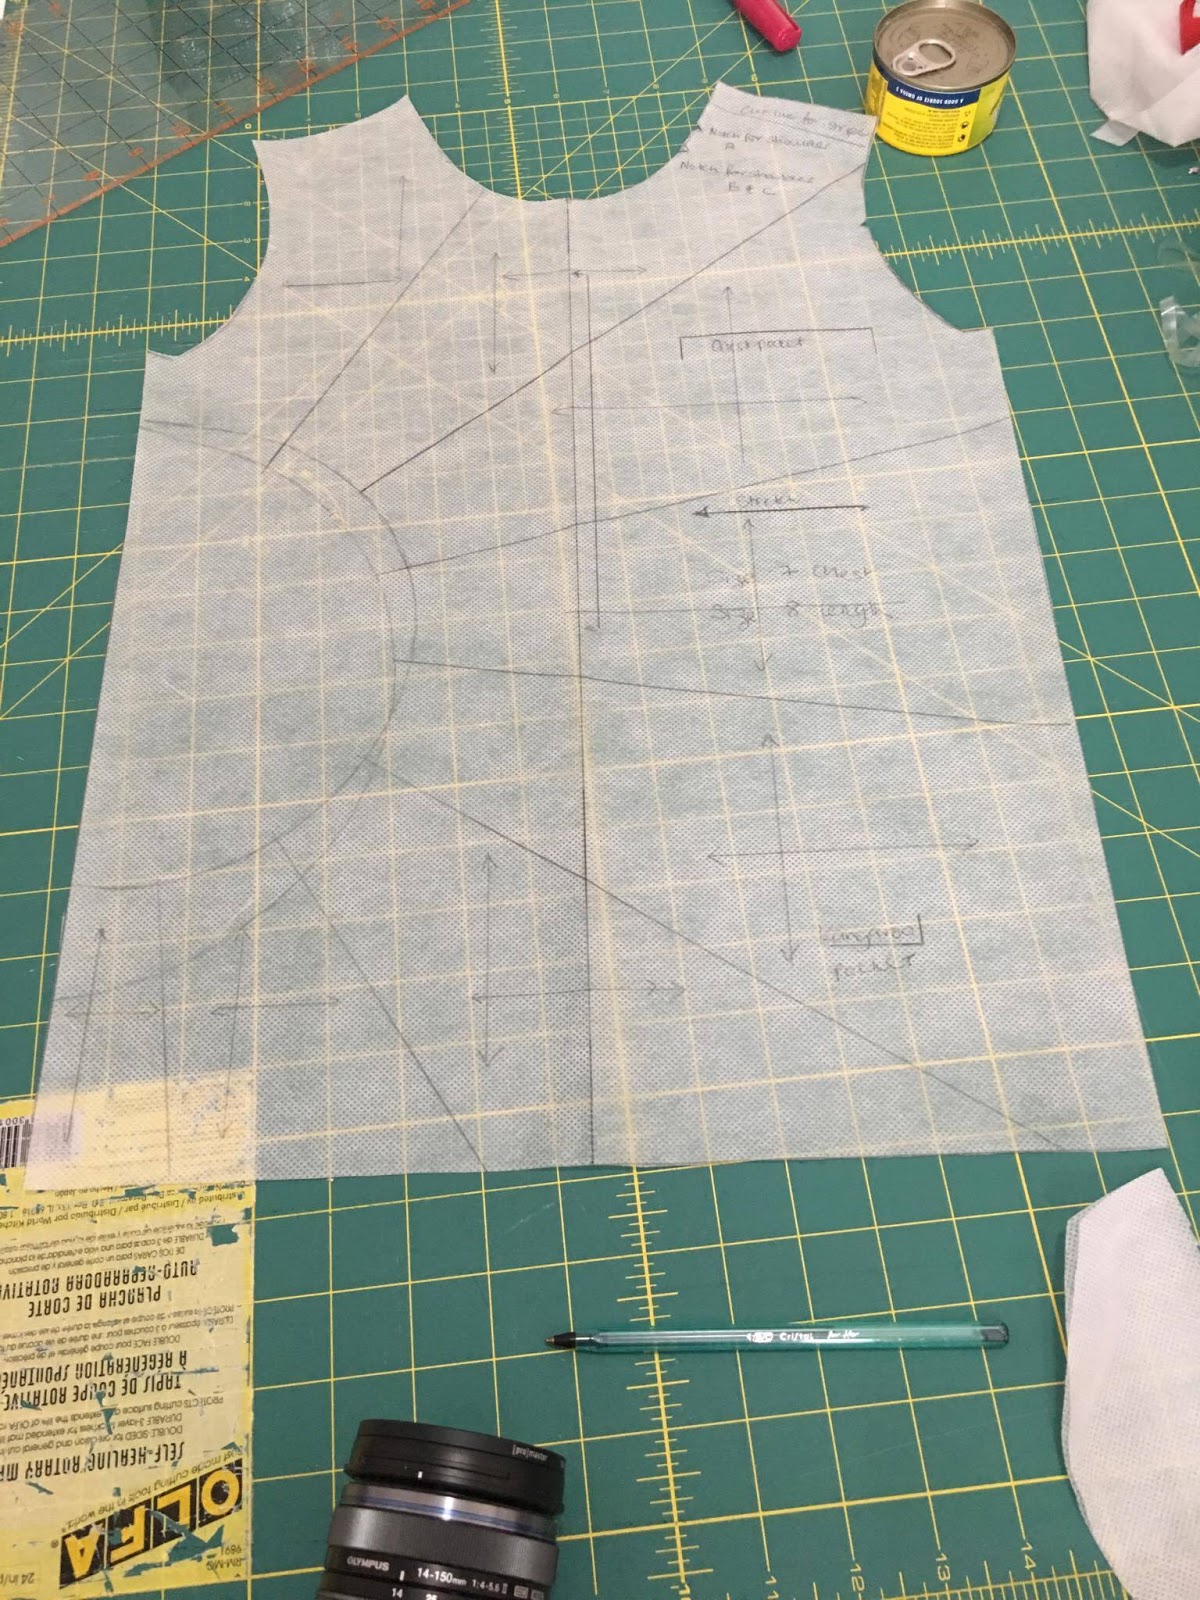
Print and assemble the corresponding size of Spliced Sunshine Front Piece Template for your sewing project. For example; If you are sewing a size 2, then choose the “Size 2 Template Pattern.” If you are sewing a ladies size then choose the largest youth size, which is the youth size 14. This size template will be a suitable size ratio for most ladies sizes.
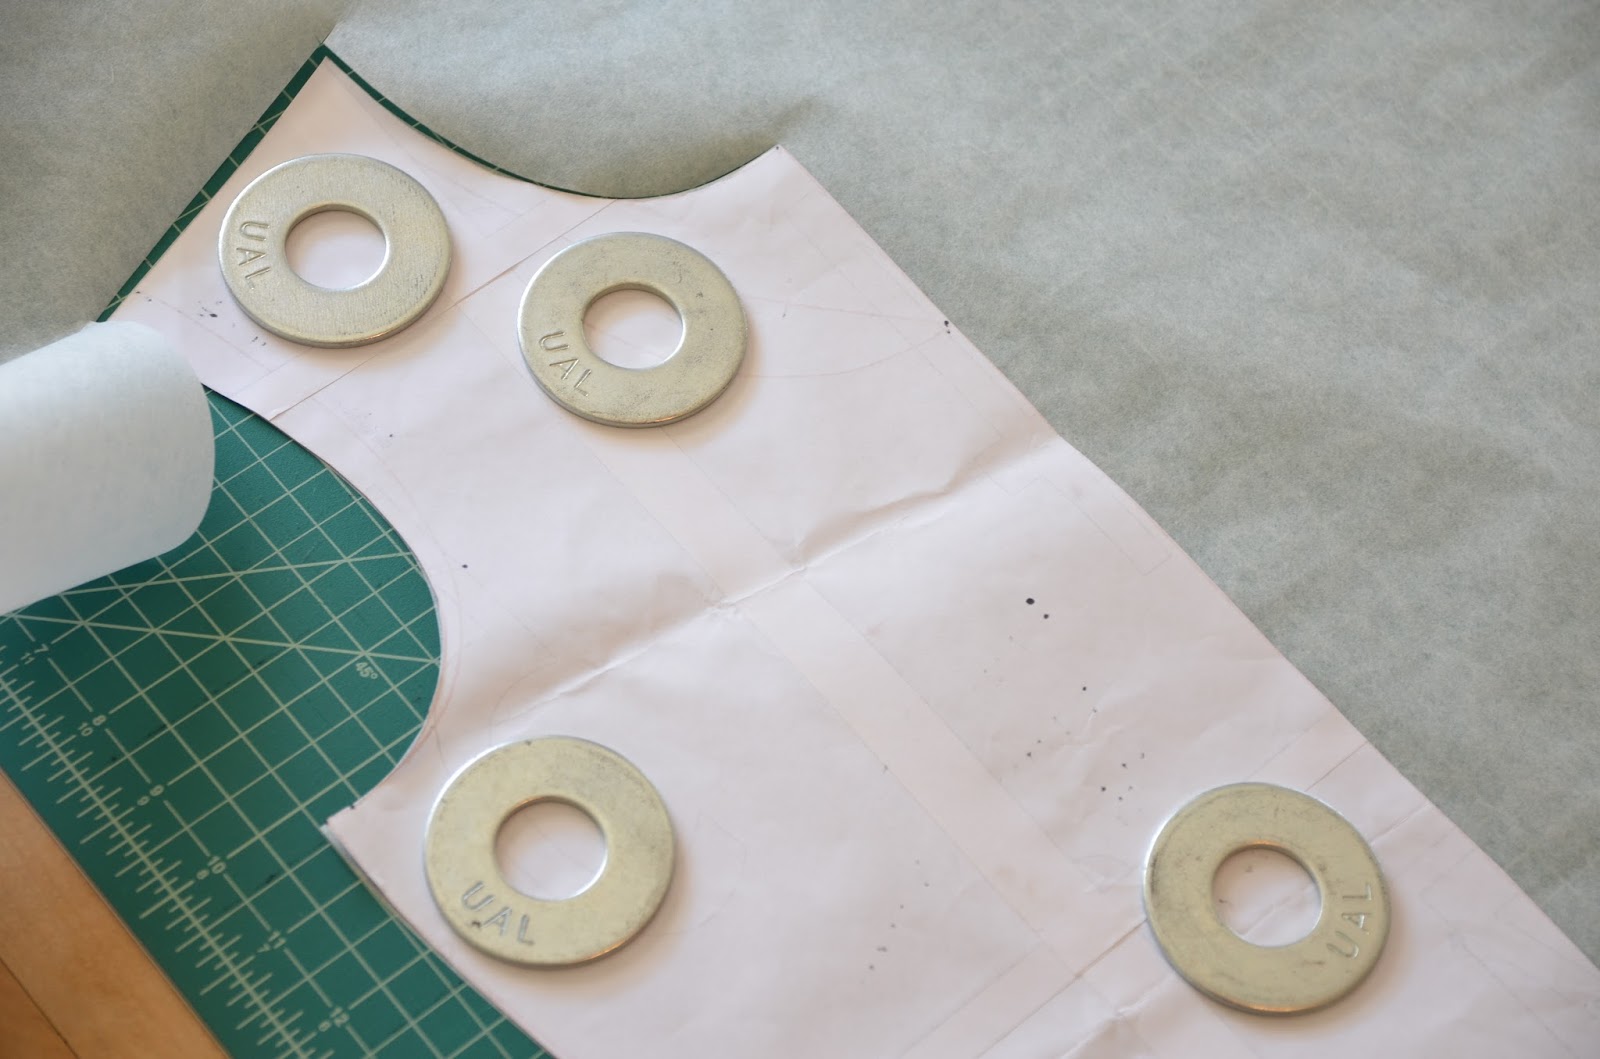
Begin by tracing both sides of the chosen shirt pattern so you end up
with a full front piece.
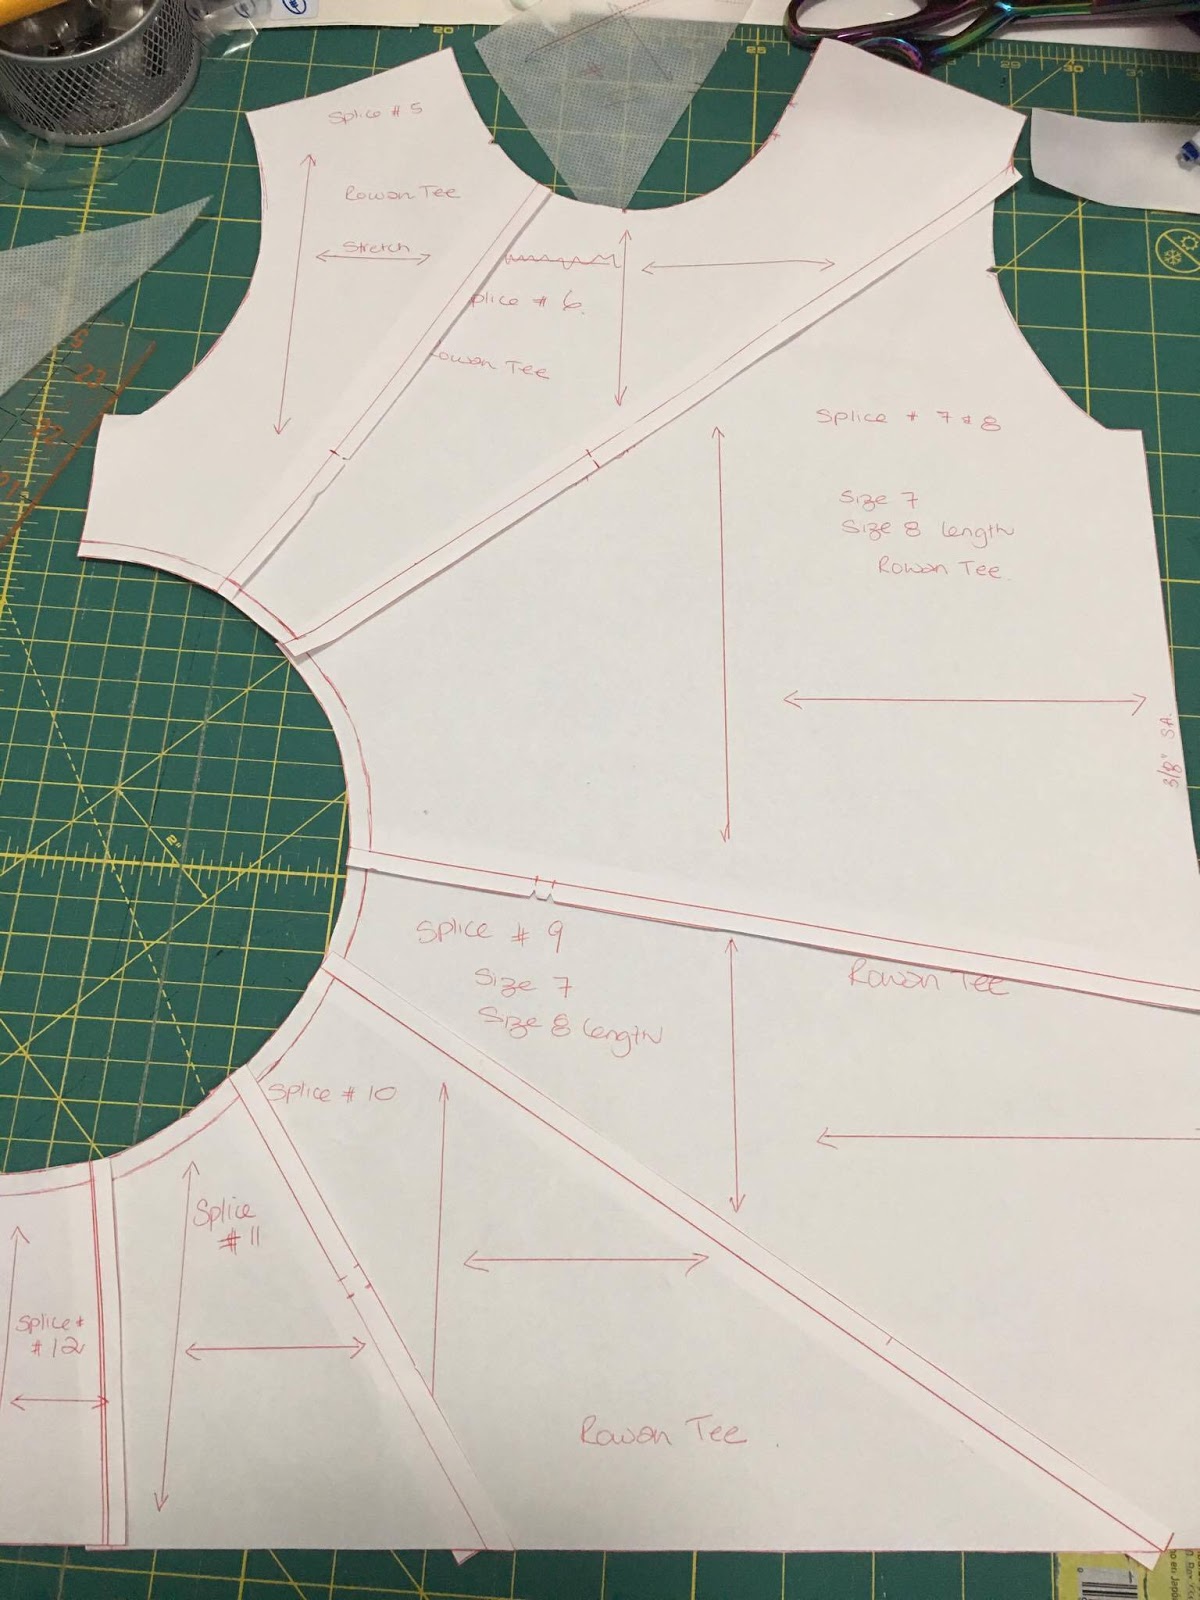
Transfer pattern marks. Fold your new traced piece in half and fold whole Sunshine Tee Template Piece in half to make it easier to line up centre using the crease. Line up traced shirt front pattern on top of spliced pattern. Line up the armsyce so the sun will stay in about the same place.
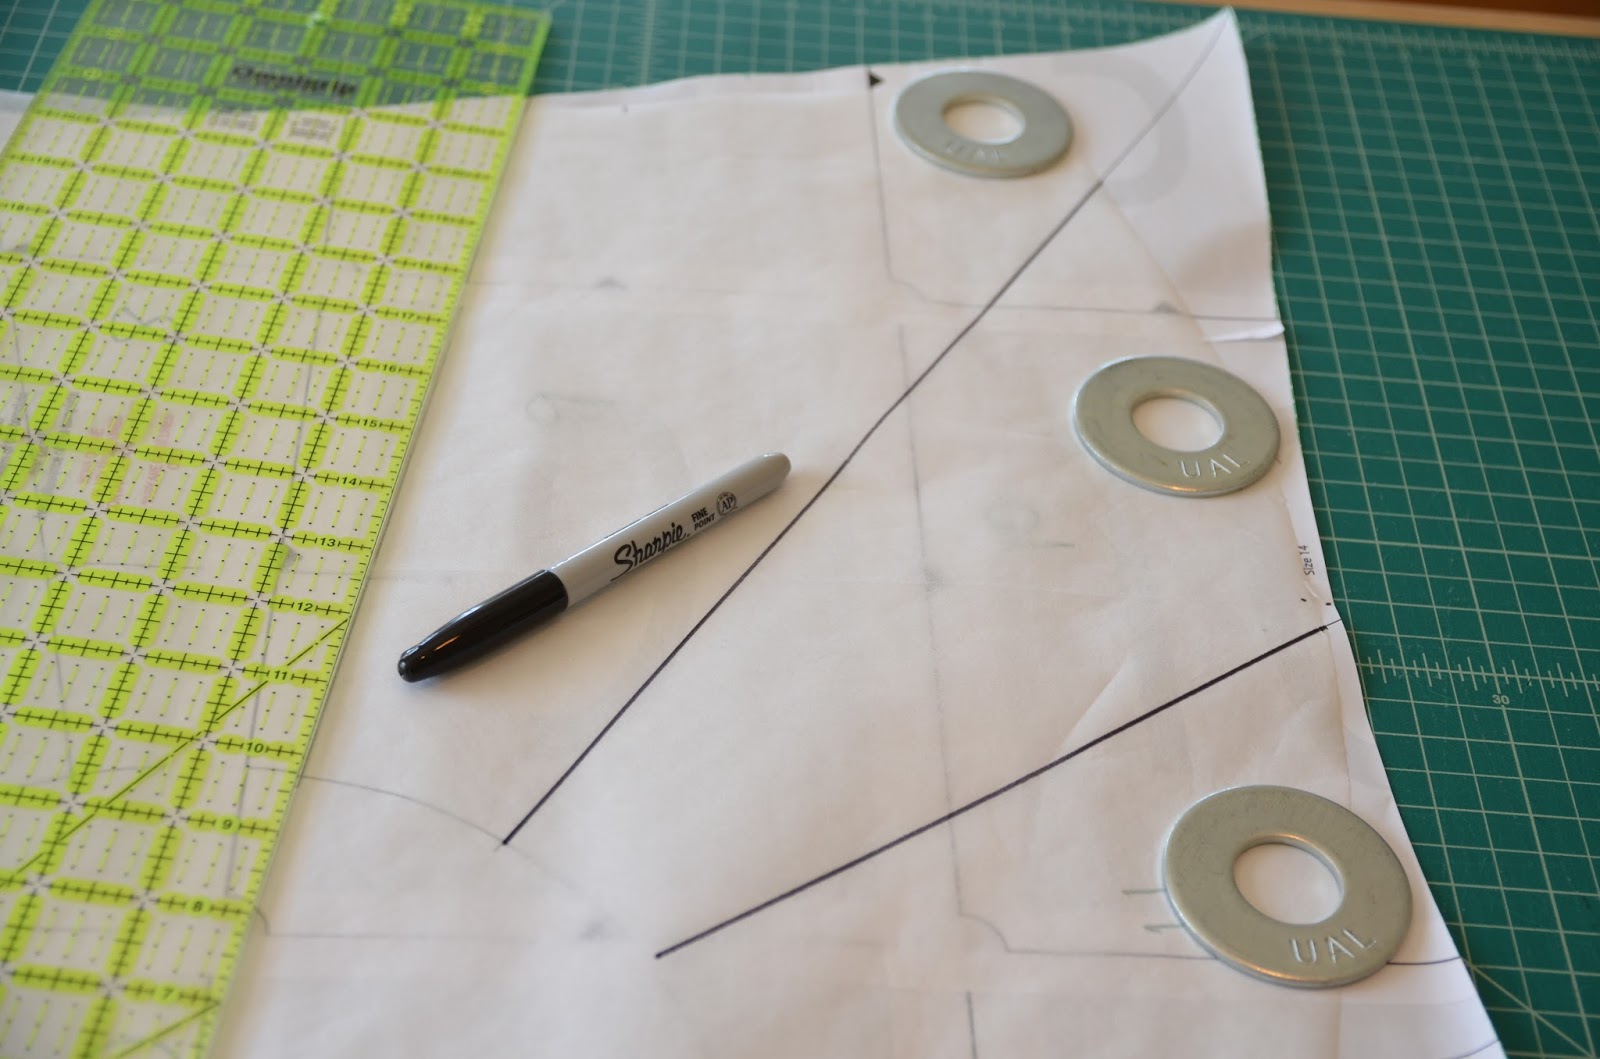
Trace sun and rays lines, extending if necessary.
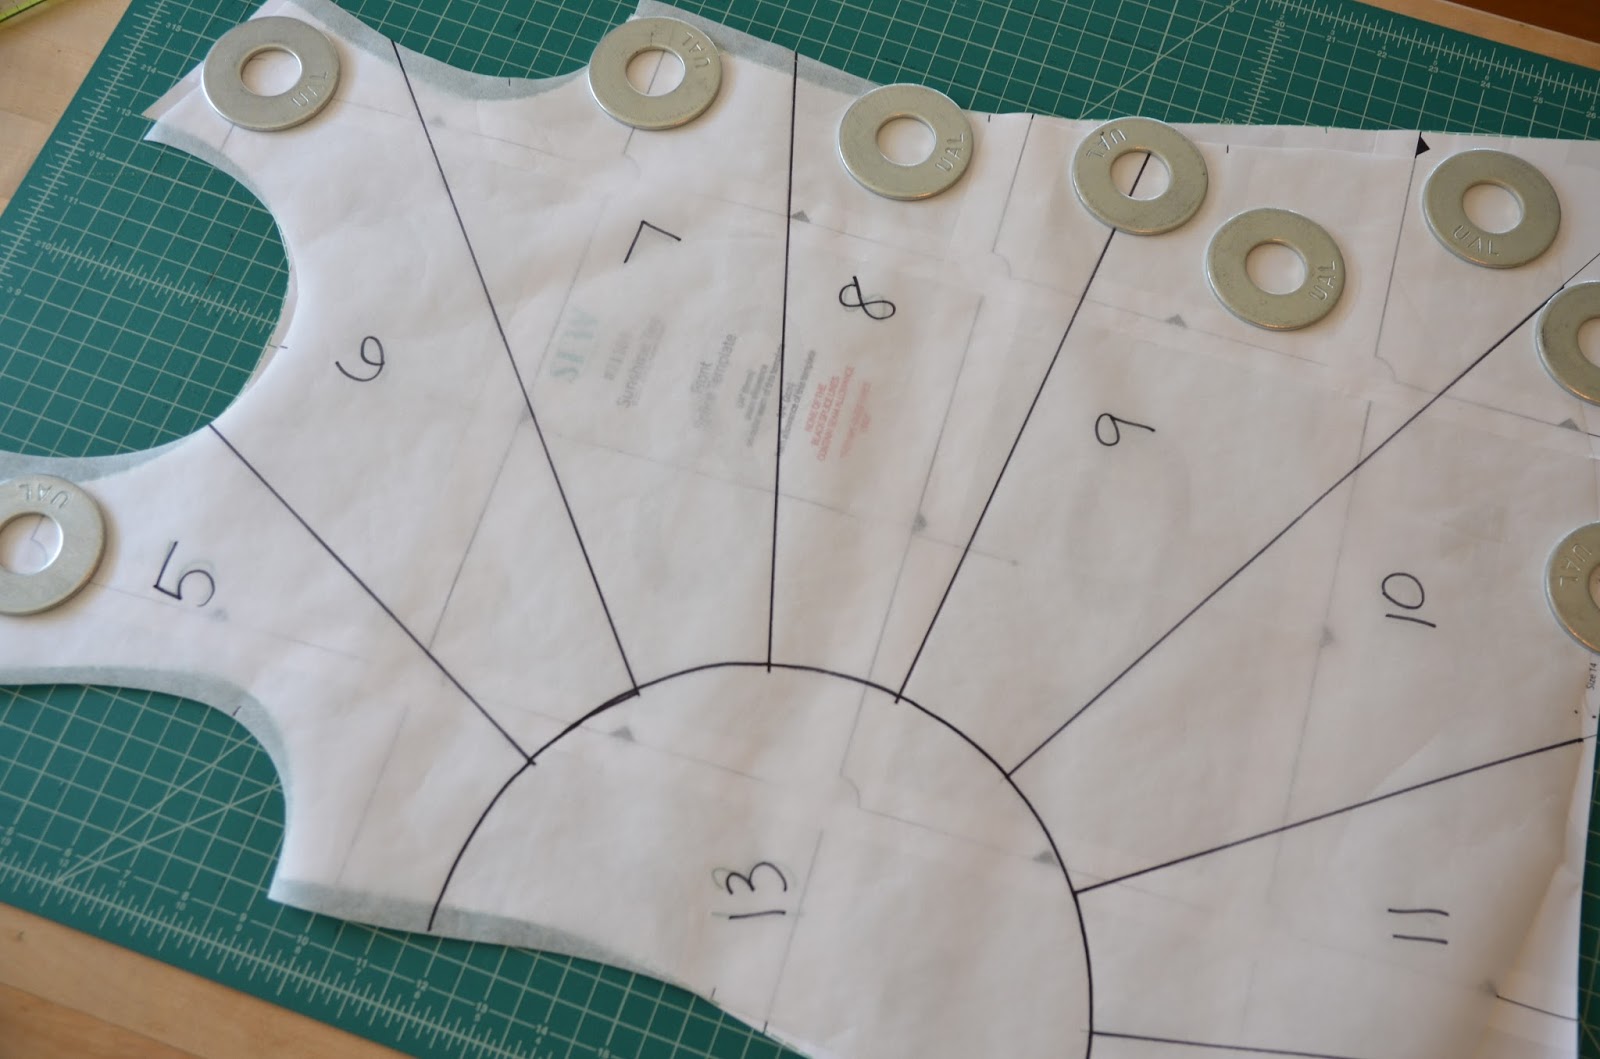
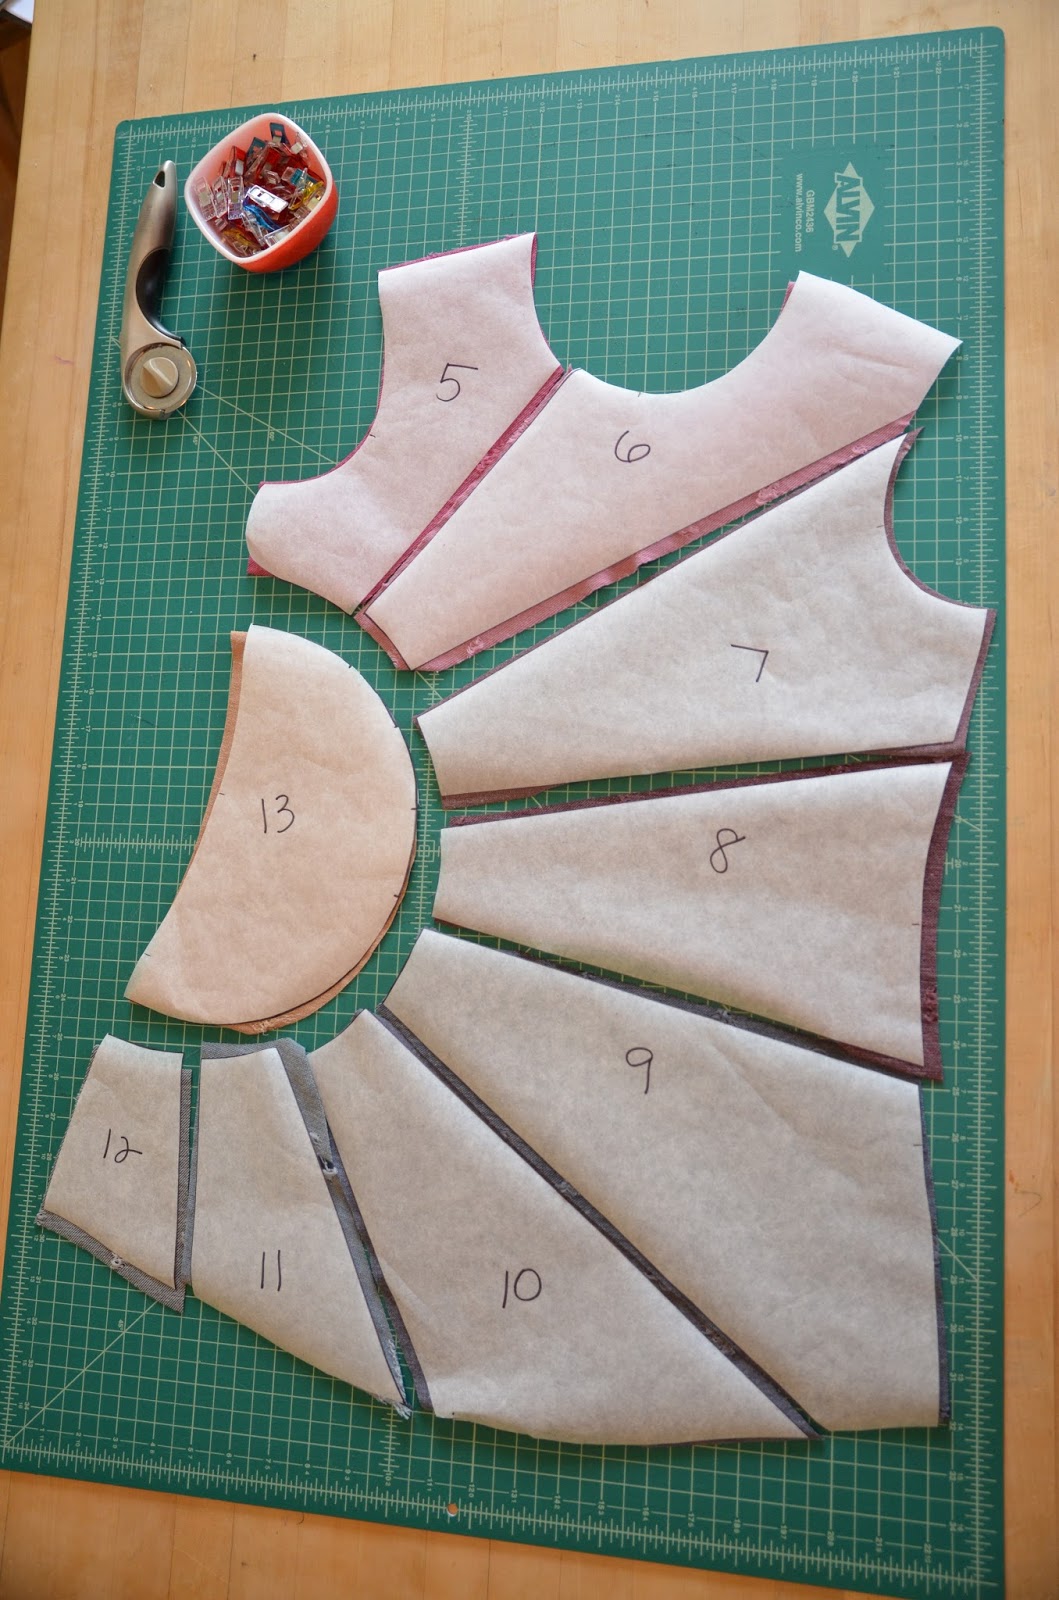
Number the pieces! Also, I’d suggest adding a grain line arrow on each piece at this stage – I wish I had done that! It was a little hard to figure it out once it was cut up.
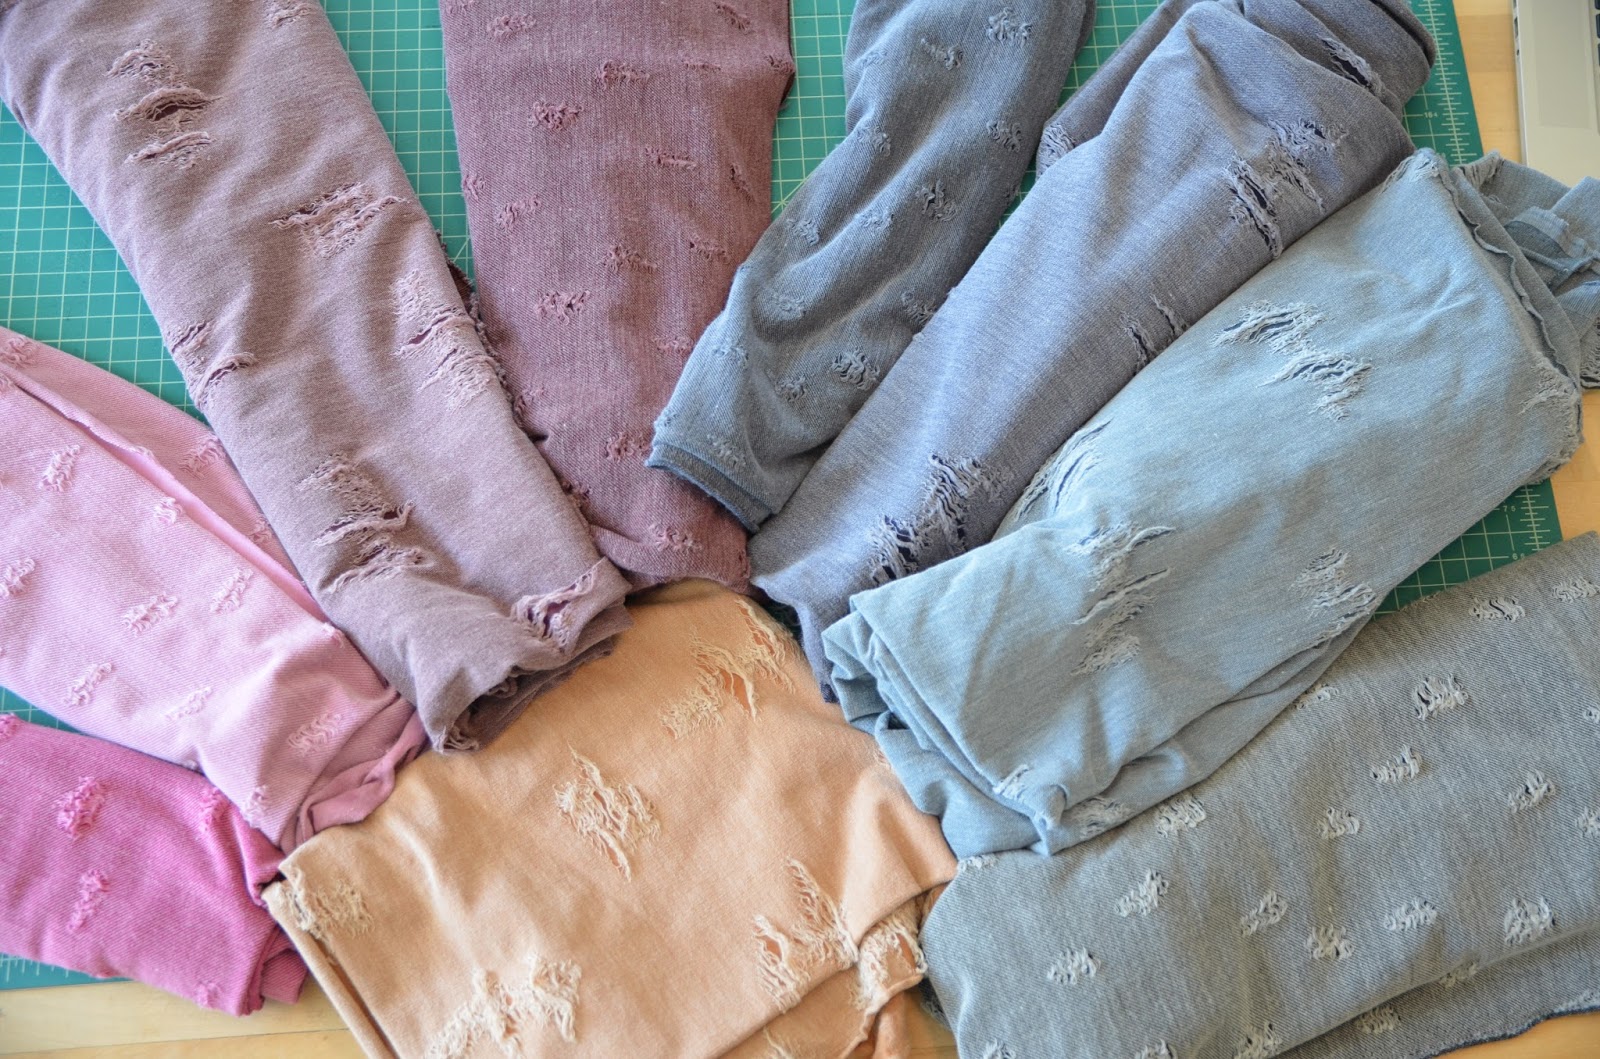
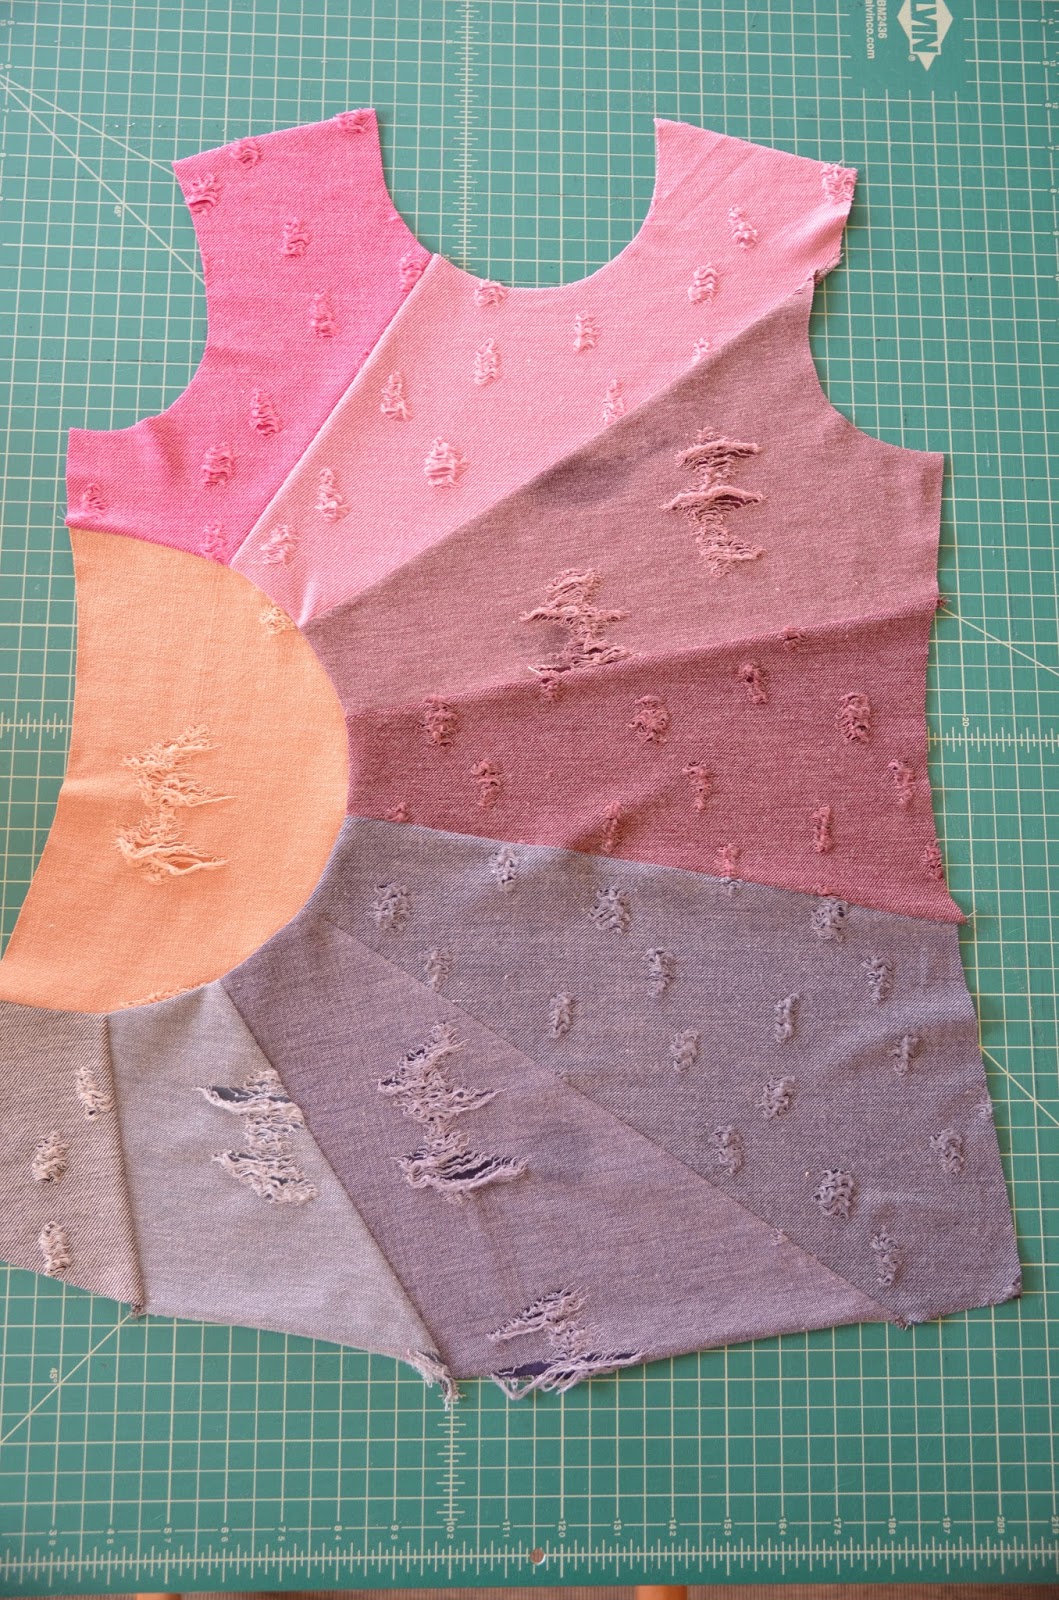
Play with fabric arrangements.
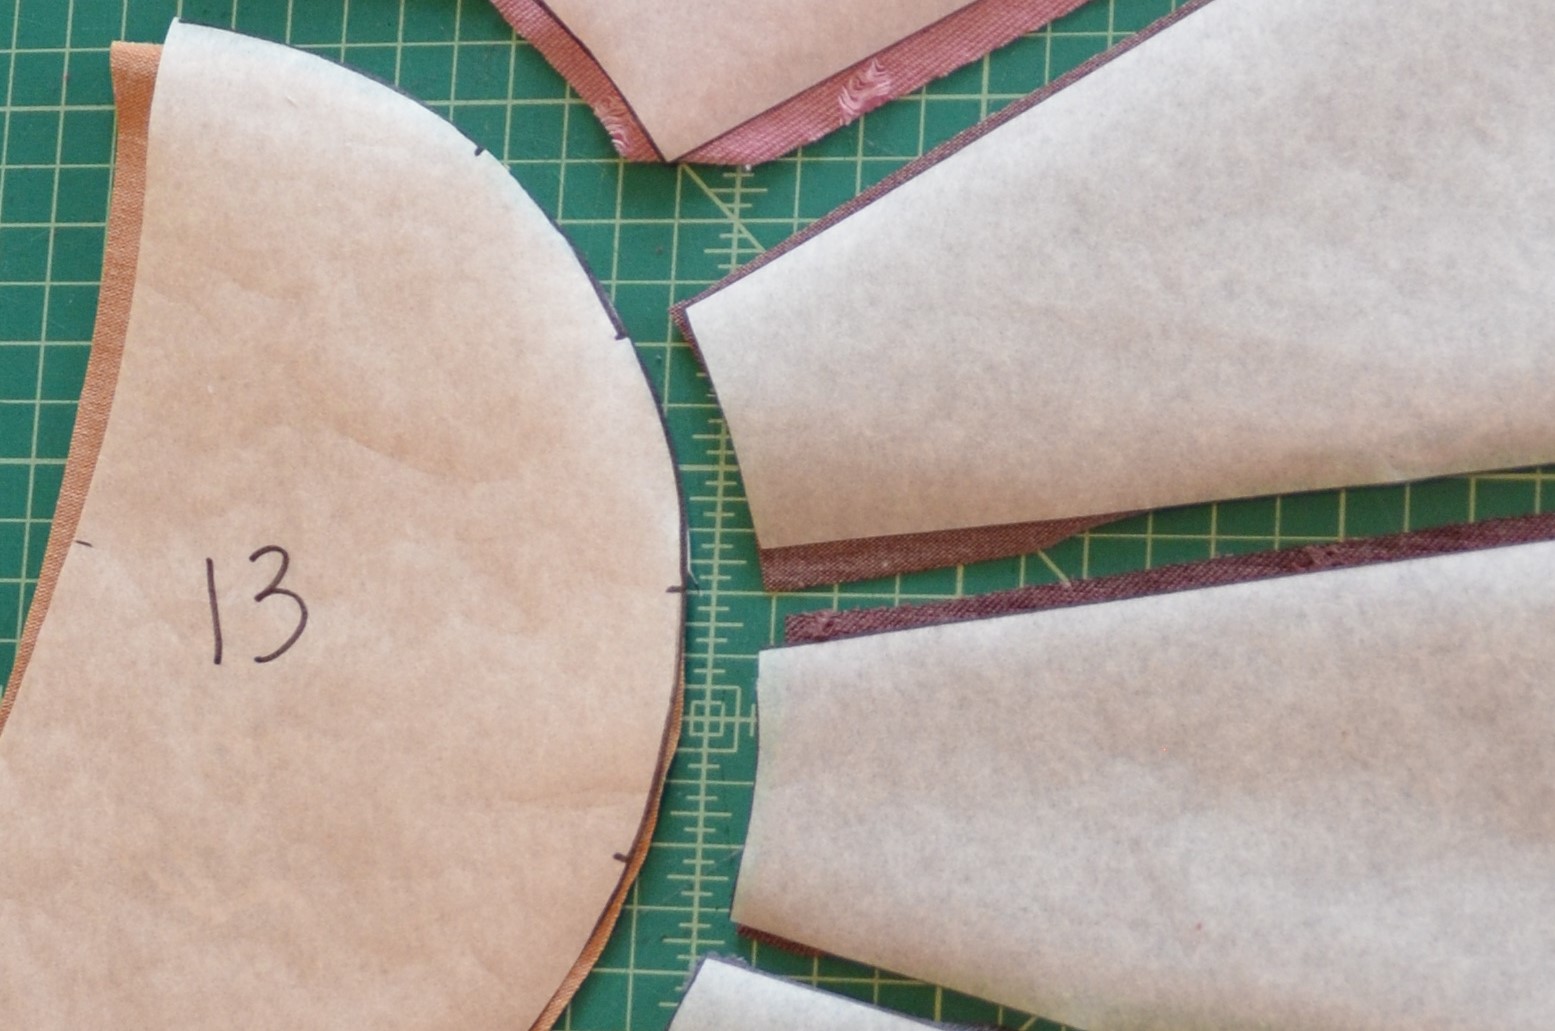
On piece #13 be sure to mark all the corresponding notches for the sun ray lines. This will assist you when sewing this curve.
Cut up new pattern pieces.
Don’t forget to add seam allowance when cutting out your pieces or retrace and add all your seam allowances to your pattern pieces!
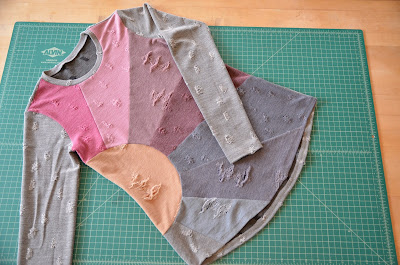
Pieces rearranged before sewing the front together to keep them in order.
When ready to sew, I recommend following the instructions from page 28. This will show the correct layout for sewing the pieces together this way all seams lay the same direction on the finished garment.
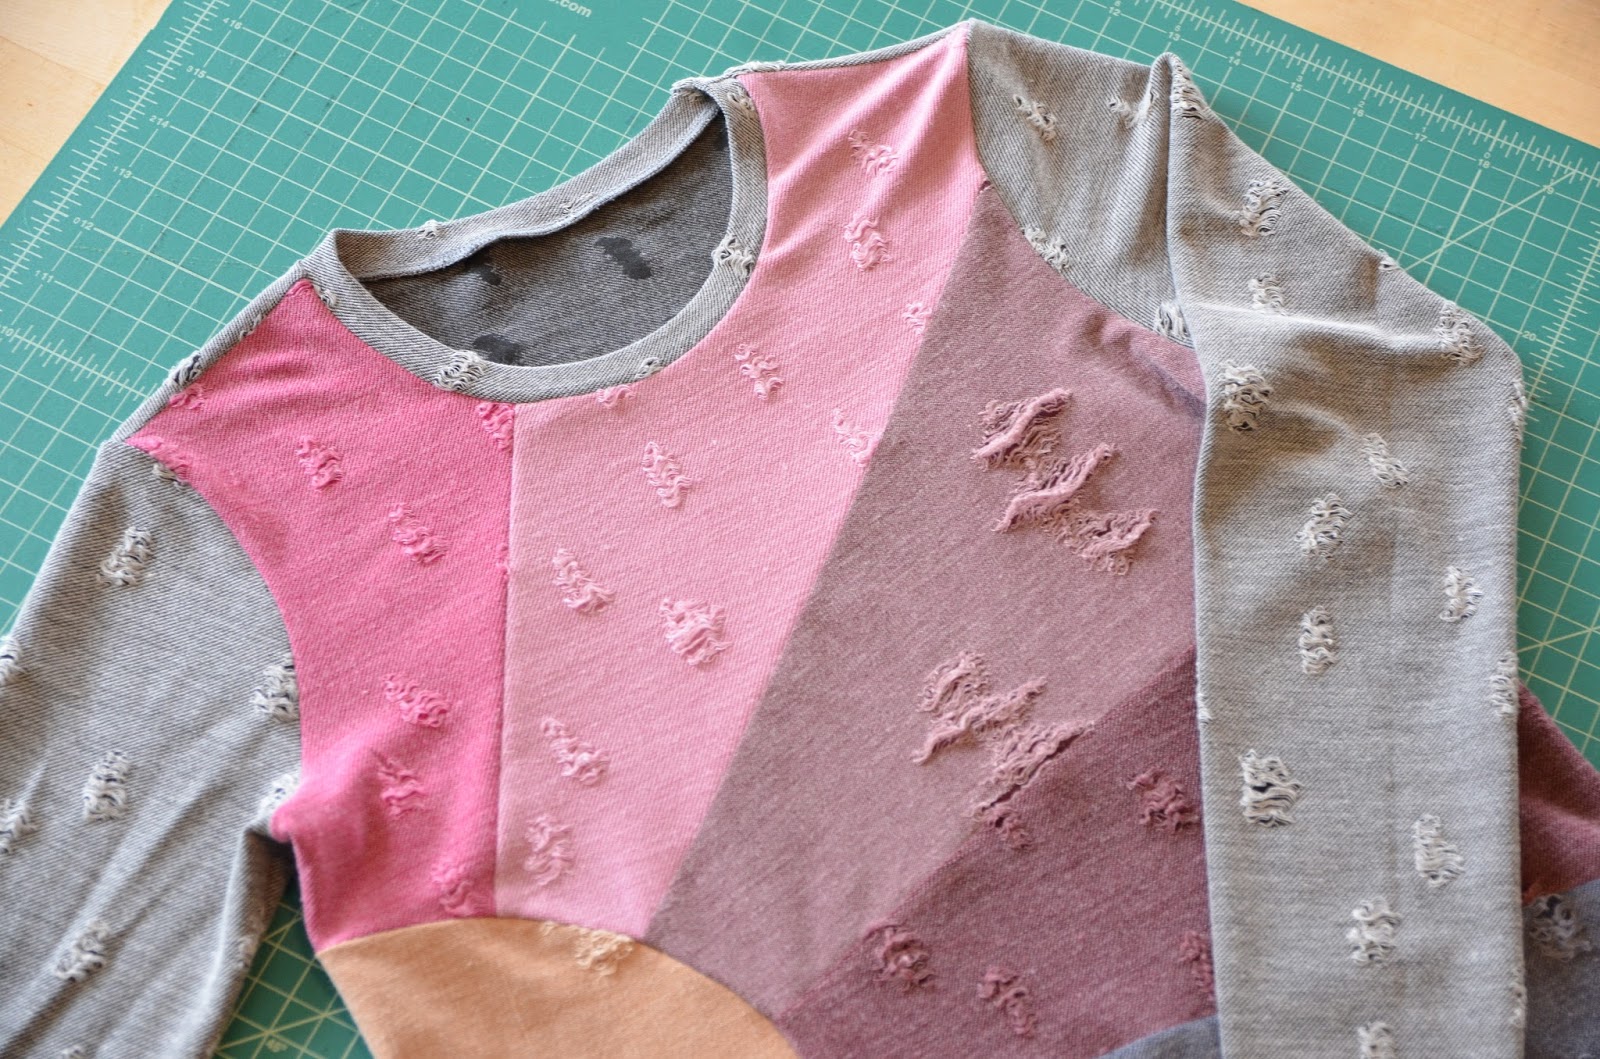
Ta da! Front piece done. Continue tutorial as written to add sleeves and back.
Beautiful t-shirt made, yeah!
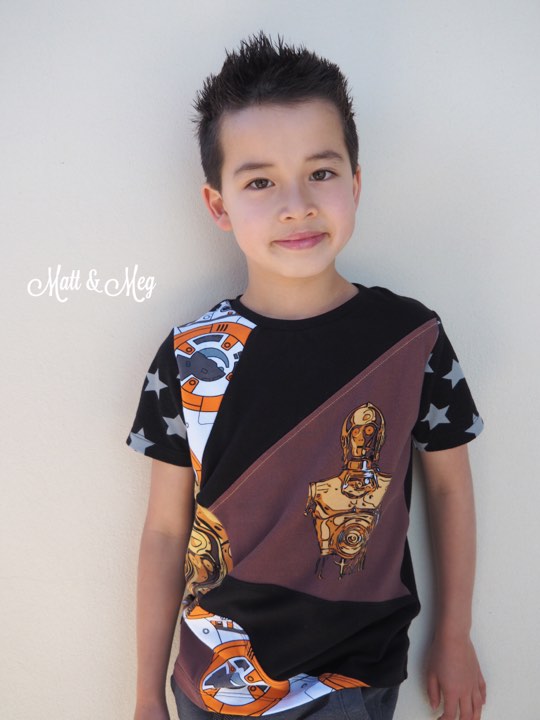
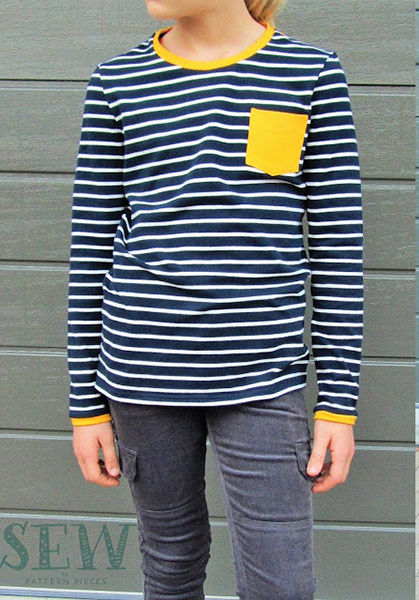
The lovely Amy Hodge has also been able to make one of these for her son. It is a boys version of the Sunshine Tee, using the “Front Piece Template!”
In this version Amy has made and adjustment to better fit her print of CP30 in the semi-circle. Note; all the the “grainlines” and “direction of most stretch” placed on the pattern pieces which just assist when going to cut out fabric.
Amy went the route of retracing and adding seam allowances to the pattern pieces before cutting.
The completed Tee. Looks awesome doesn’t it?
We hope that you will get the time to make one for yourself or loved one and put a little Sunshine into their life too.
Shop for Pattern: HERE
Instagram Hashtag: #sunshineteepdfpattern #sewbypatternpieces
Pinterest Page: HERE