Stinger Suit Zipper Hack
Sewing the Zipper Into the Back of the Neckline
The lovely Samantha Wolgast from Little Jem Handmade has been sending me the most beautiful photographs of suits that she has been making from our Stinger Suit pattern, with the zip inserted up the back.
If you would like to keep a copy of this tutorial for later use, please download a copy here. (Works from desktop-only!)
The tutorial has also been added to the files menu of our Sewing Group.

I know many of you out there have been wanting to be able to do this also. I asked Samantha if she would be able to capture some pics of the process the next time she made one and put a few instructions with them, so that you can see how she does it and be able to follow along and make some of your own.


Samantha was only too pleased to do this for us and therefore I hope you enjoy reading and following along with her instructions below. We hope to see your own creations, using these instructions, in the near future either on our Facebook Group or tag me @sewbypatternpieces via your Instagram account.

Sammantha’s Instructions
So, I am sure we’ll get stuck into our sewing projects to while away the time while we are in isolation. I have been asked several times by my customers if I could do a stinger suit (awesome sun protection!) with the zipper at the back!
Well sure why not I said hahahaha…. Surely it can’t be that hard……well guess what? It isn’t hard at all! If you have already made a stinger suit you should find this super easy to do….
Grab your pattern & check measurements of the child you are making it for & work out the best size. (all sizing info and how to work out the mixing of sizes to get the perfect fit instructions are included in your stinger suit pattern).
For my model I made a straight size 8.
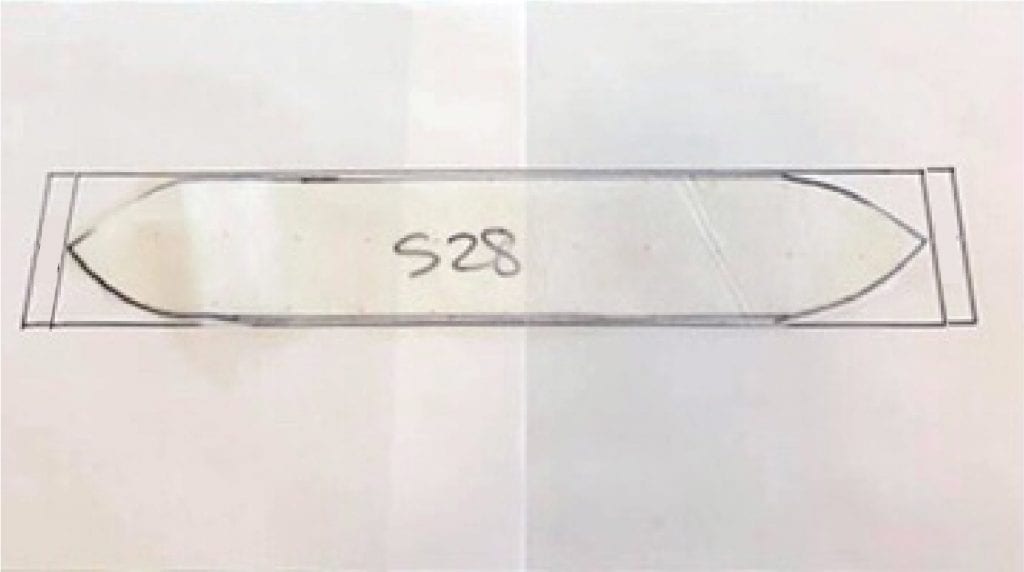
Gather all your pattern pieces…. For the collar, you will need to make a basic adjustment. Grab some paper or pattern trace & take your collar piece and re-draw making the curved ends into a straight rectangle piece adding a further 1/4″ or 6mm each side, see pic below.

Cut out the collar piece but leave the zipper cover for the moment.
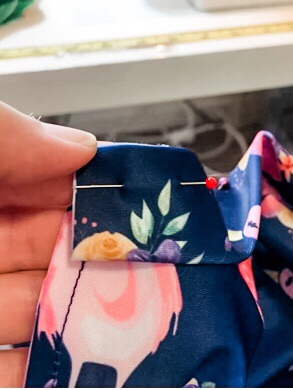
Now following the original instructions from the stinger suit prepare your BACK piece for the zipper… I like to draw on my lines with a sewing pen. See pics below.
For this suit I made the zipper about 10cm longer than what would have been needed for the front. The back neck is higher than the front and extra is also required for the zip to reach to the top of the collar.
I drew the mark at the end of the pattern piece adding the extra, then drew on the lines.


Now you are ready to proceed just like you would any other stinger suit, do not forget to sew in your little tab at the base of the zip as described in the purchased instructions.


After you have sewn the front & back pieces together you will need to attach your NEW collar piece (it should be a rectangle) The end of the collar should line up with the edges of the zip insertion spot on your back piece. Sew on your collar matching the centre fronts together.

Now you are ready to insert your zip. Make sure that the top of the zipper sits nicely to the top of your collar.


You now need to add your zipper guard & top stitch (same as the original pattern) you will need to add extra length, to the zipper guard, so re-measure how long you will need. Finish off inserting & top stitching your zip.

Now complete the rest of your suit following the instructions, and you are done!

Thank you so much to Samantha for this awesome tutorial.
If you would like to purchase a copy of the original pattern you are welcome to visit our store. The Stinger Suit is available in both Ladies and Girls Sizes.
Shop for Pattern: Girls Pattern HERE Ladies Pattern HERE
Instagram Hashtag: #stingerbodysuitpdfpattern #sewbypatternpieces
Tester Inspiration: Girls Blog Post Link Ladies Blog Post Link
Pinterest Page: Girls HERE Ladies HERE


